
Mastering Off Camera Flash for Weddings: Complete Lighting Guide 2026

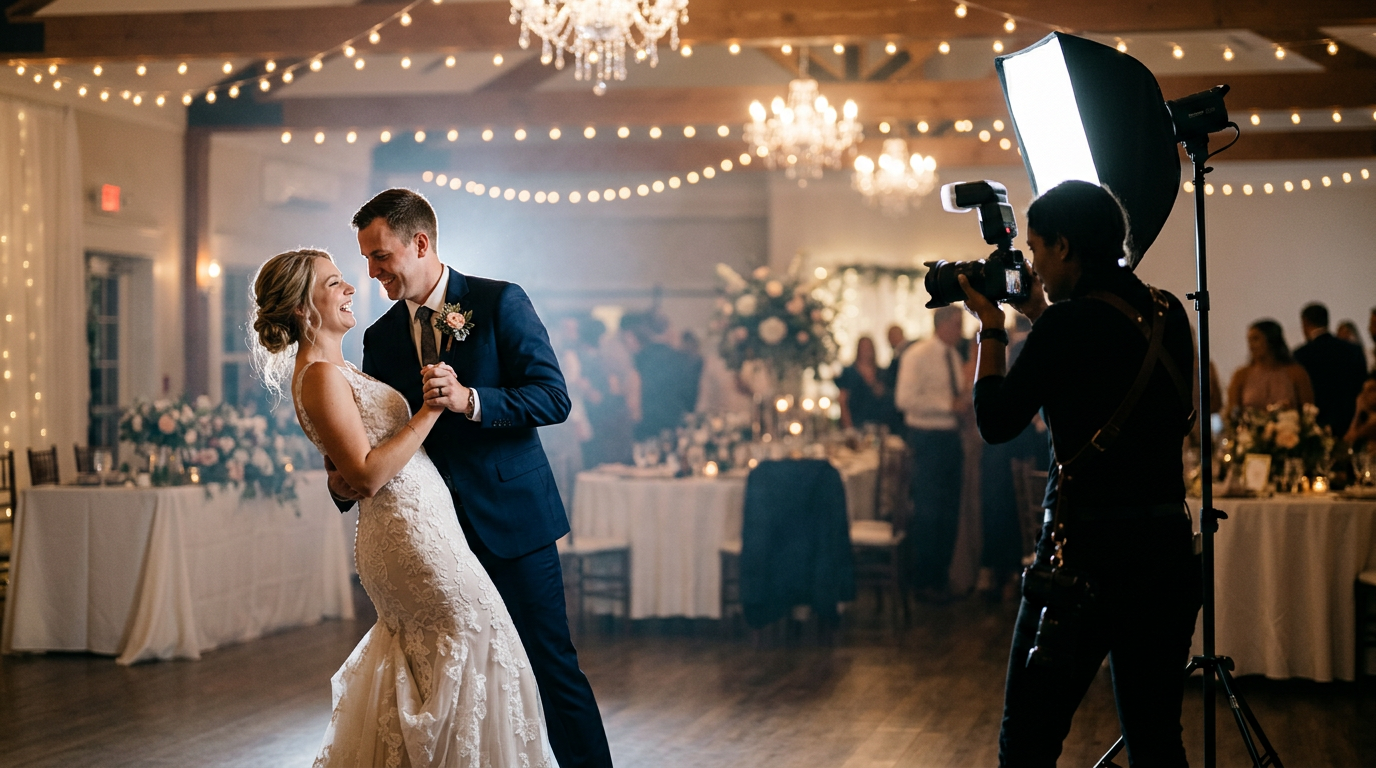
Off-camera flash sculpts warm, directional light across a wedding reception dance floor.
Quick Answer
Off camera flash for weddings means moving your flash off the camera and positioning it 45–60° from your subject, softened with a modifier. Start around 1/4 power, ISO 800, f/4, and 1/200s shutter, then adjust to balance flash with the venue's ambient light. Done well, it delivers soft, directional, professional-looking light from ceremony to reception.
In This Article:
- What Is Off Camera Flash and Why Use It?
- Essential Equipment for Off Camera Flash at Weddings
- Step-by-Step Setup for Wedding Reception Lighting
- Using Flash Modifiers to Improve Your Light
- Mastering Flash Positioning and Angles
- Lighting Techniques Every Wedding Photographer Should Know
- Tips for Wedding Reception Lighting
- Flash at Ceremonies: When and How to Use It
- Common Mistakes to Avoid
- Advanced Techniques for Dramatic Wedding Shots
- Capturing Motion with Flash
- Frequently Asked Questions
Wedding photography is not just about capturing moments — it's about creating images filled with emotion and artistry. Lighting plays a huge role in this, and mastering off camera flash for weddings can take your photos from simple snapshots to breathtaking portraits.
In this guide, we'll walk you through everything you need to know about using off camera flash effectively at weddings — from the basics of flash setup to advanced lighting techniques that will elevate your work in 2026.
What Is Off Camera Flash and Why Use It?
Off camera flash means positioning your flash away from the camera, often triggered wirelessly or with a sync cord. Unlike the harsh light from your camera's built-in flash, off camera flash gives you full control over where and how light falls on your subjects.
Why is this important for wedding photography? Because it allows you to:
- Create natural, flattering light that mimics soft window light.
- Add drama and dimension through controlled shadows.
- Maintain consistent exposures in venues with tricky or changing lighting.
- Improve overall image quality from ceremony to reception.
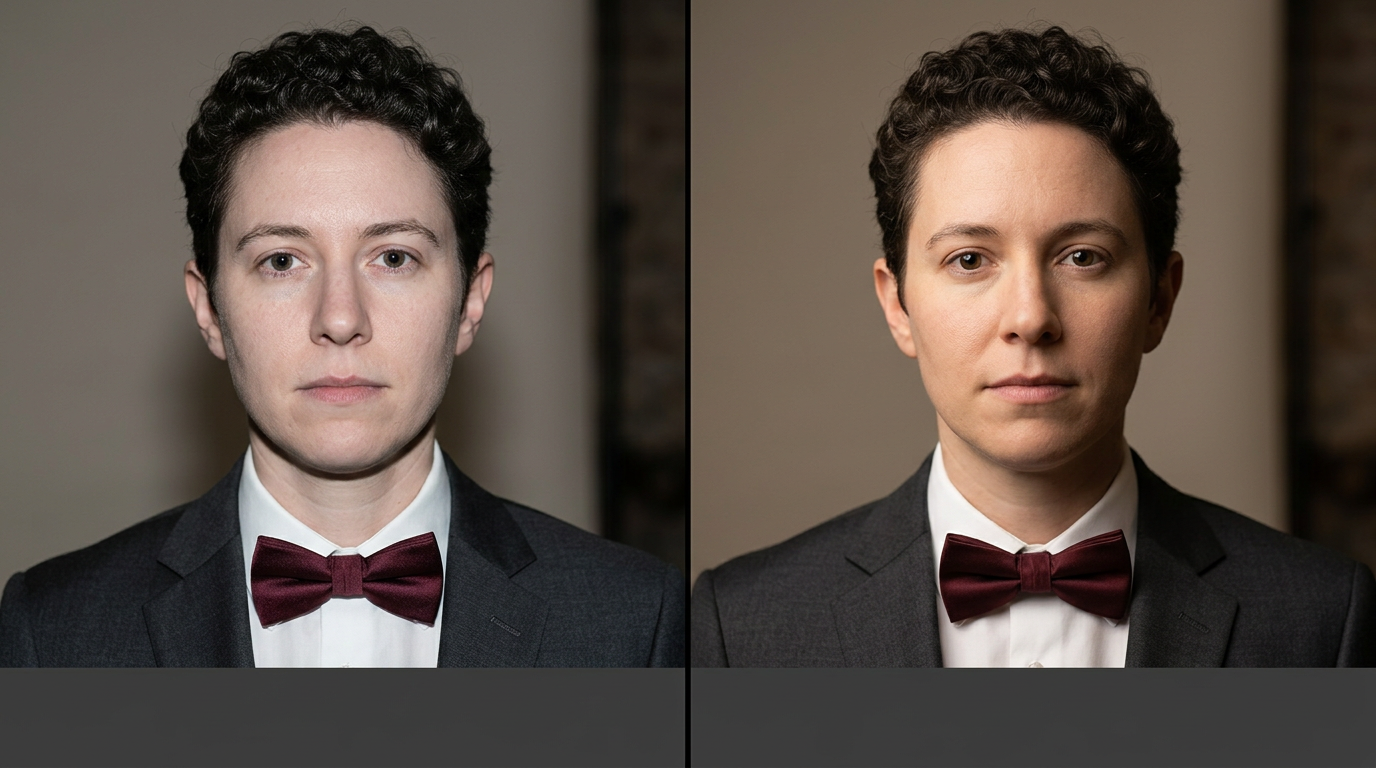
The difference between flat on-camera flash (left) and directional off-camera flash (right).
Essential Equipment for Off Camera Flash at Weddings
To get started, here's what you'll need:
- Flash units: TTL-capable speedlights like the Canon 600EX-RT, Nikon SB-5000, or Godox V1.
- Wireless triggers: Reliable systems like the PocketWizard Plus IV or Godox X2T.
- Light modifiers: Softboxes (~24–32 inches), shoot-through umbrellas, and bounce cards for softening light.
- Supports: Lightweight stands, clamps, and sandbags to keep your gear stable.
- Power: Extra rechargeable batteries or external power packs to last through long days.
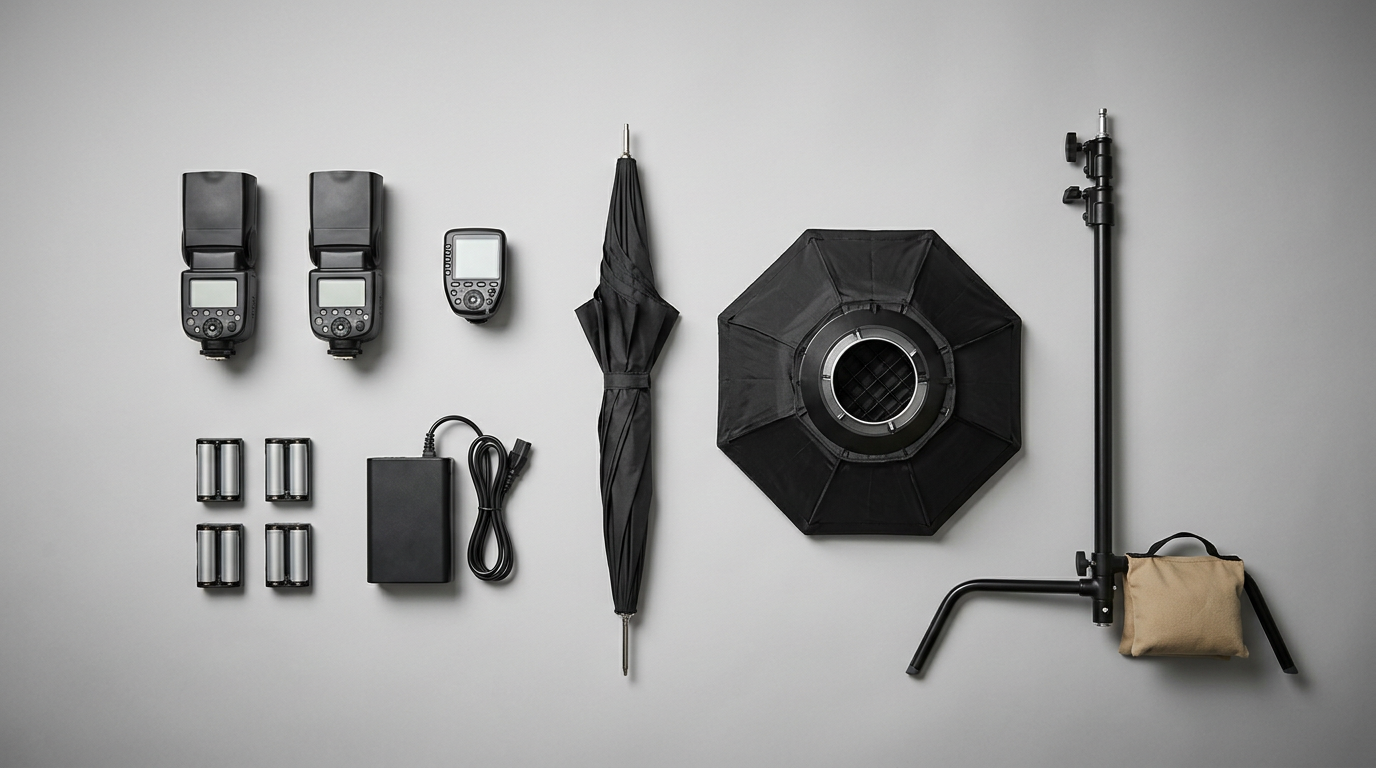
A typical off-camera flash kit: speedlights, triggers, modifiers, and stands.
Step-by-Step Setup for Wedding Reception Lighting
- 1
Assess the venue
- 2
Position the main flash
- 3
Sync wireless triggers
- 4
Dial in your settings
1. Assess the Venue First
Before you set anything up, walk around the reception area. Look for power sources, ceiling surfaces (great for bounce flash), where your gear can safely stay out of foot traffic, and what ambient light you already have to work with.
2. Position Your Main Flash
Place your flash about 45–60 degrees off to the side from your subject. This angle creates natural-looking highlights and soft shadows that enhance depth without feeling artificial.
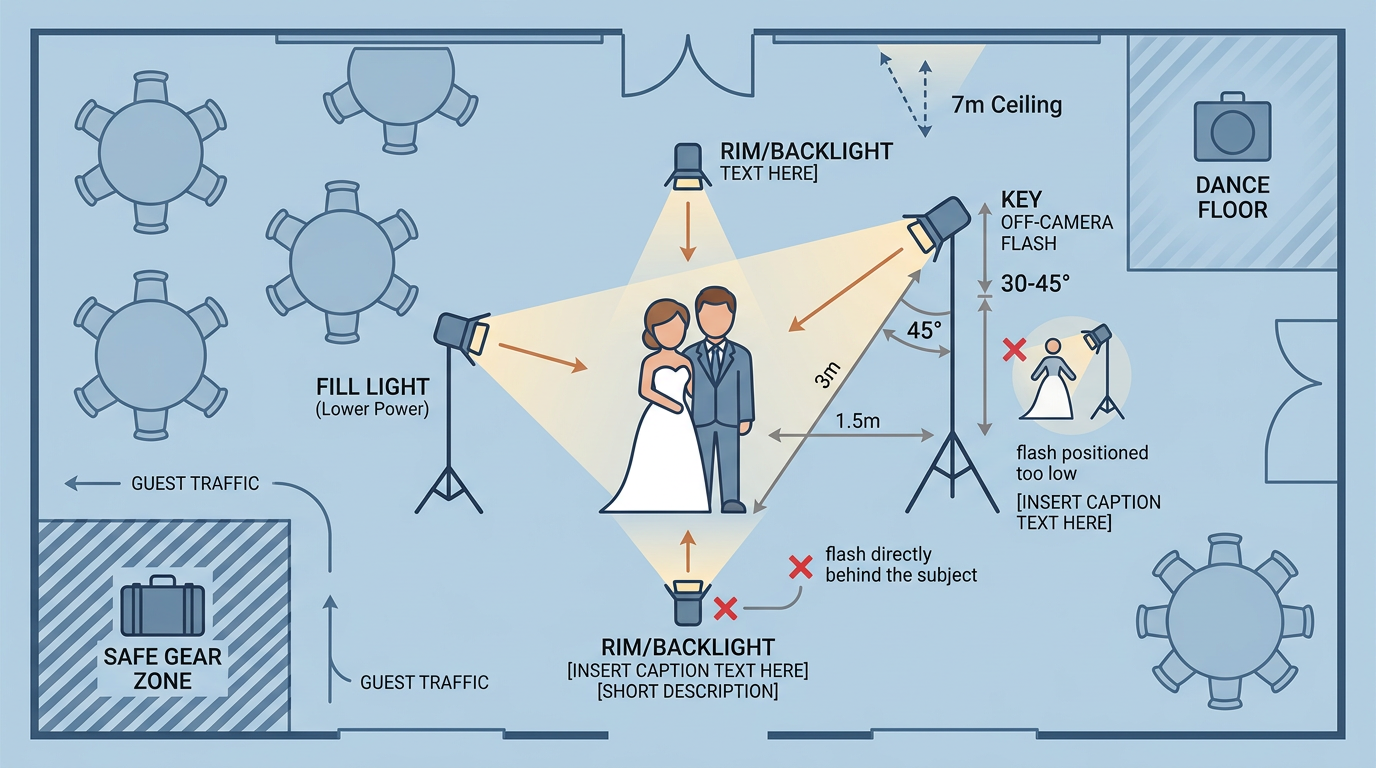
A reliable reception setup: 45° key light, soft fill, and a rim light for separation.
3. Set Up Wireless Triggers
Attach the transmitter to your camera and sync all flashes to the same channel or group. Test the connection before guests arrive. Modern TTL systems make this fairly straightforward even in crowded venues.
4. Adjust Your Settings
Start with manual flash power around 1/4, ISO 800, aperture f/4, and shutter speed 1/200s. Tweak these settings based on how bright or dark the venue is.
Using Flash Modifiers to Improve Your Light
- Softboxes: Offer smooth, even light perfect for portraits and small groups. An octagonal shape creates attractive catchlights in the eyes.
- Umbrellas: Quick to set up and break down. Shoot-through umbrellas soften harsh light, while reflective umbrellas offer more contrast.
- Bounce cards and diffusers: Great for filling in shadows or softening hard flash in a pinch.
Mastering Flash Positioning and Angles
The classic 45-degree rule works wonders: placing your flash at a 45-degree horizontal angle and around 30–45 degrees above your subject gives flattering light with natural shadows.
Avoid these common mistakes:
- Don't put the flash straight behind your subject — it causes harsh backlighting.
- Avoid positioning the flash at eye level — it creates unflattering shadows under the eyes.
- Keep the flash from being too low to avoid strange upward shadows.
Lighting Techniques Every Wedding Photographer Should Know
Avoiding Harsh Shadows with Bounce Flash
Aim your flash at a white ceiling or neutral-colored wall to bounce light gently onto your subjects. This produces soft, natural-looking illumination that's perfect for wedding portraits and reception shots.
Managing Distance and Power
Remember the inverse square law: the farther the flash from the subject, the softer and less intense the light. Use this to your advantage to dial in the perfect exposure and mood.
Using Multiple Flashes
Adding a second flash gives you creative flexibility — one for key light and another for fill or background separation. For formal portraits, try a classic three-point lighting setup with key, fill, and background lights for that polished, magazine-style look.
Understanding Lighting Ratios
- 80/20 rule: 80% of your light comes from the main source and 20% from fill, creating natural-looking shadows with depth.
- 3:1 ratio: Your key light is three times brighter than the fill, resulting in more contrast and dramatic portraits.
Tips for Wedding Reception Lighting
- Color gels: Use warm gels to match tungsten light, or cool gels for dramatic effects.
- Blend ambient and flash: Don't overpower the venue lighting; adjust flash output to complement ambient light beautifully.
- Background lighting: Place a flash behind the couple or dancers aimed at the background for depth and separation.
Flash at Ceremonies: When and How to Use It
Most pros avoid flash during the ceremony to respect the solemnity and avoid distractions. Instead, rely on natural light or raise your ISO for darker settings. If flash is absolutely necessary, bounce it at very low power, or use discreet LED panels as a gentle alternative.
Common Mistakes to Avoid
- Direct flash from the camera: Creates harsh shadows and red-eye. Always bounce or angle your flash.
- Wrong height: Flash at subject eye-level causes unflattering shadows; raise your light above head height.
- Sync and power issues: Keep shutter speed within your camera's sync limit (usually up to 1/200s). Be mindful of flash overheating and wireless interference.
Advanced Techniques for Dramatic Wedding Shots
- Rim lighting: Place a flash behind your subjects to create glowing edges that separate them from the background.
- Colored background lighting: Use gels to add mood and atmosphere to your dance floor shots.
- Split lighting: Shine your main light from the side to highlight half the face, creating artistic portraits full of drama.
Capturing Motion with Flash
Try combining slow shutter speeds (1/15s–1/30s) with flash to freeze your subject while capturing motion blur in the background — perfect for bouquet tosses and the dance floor.
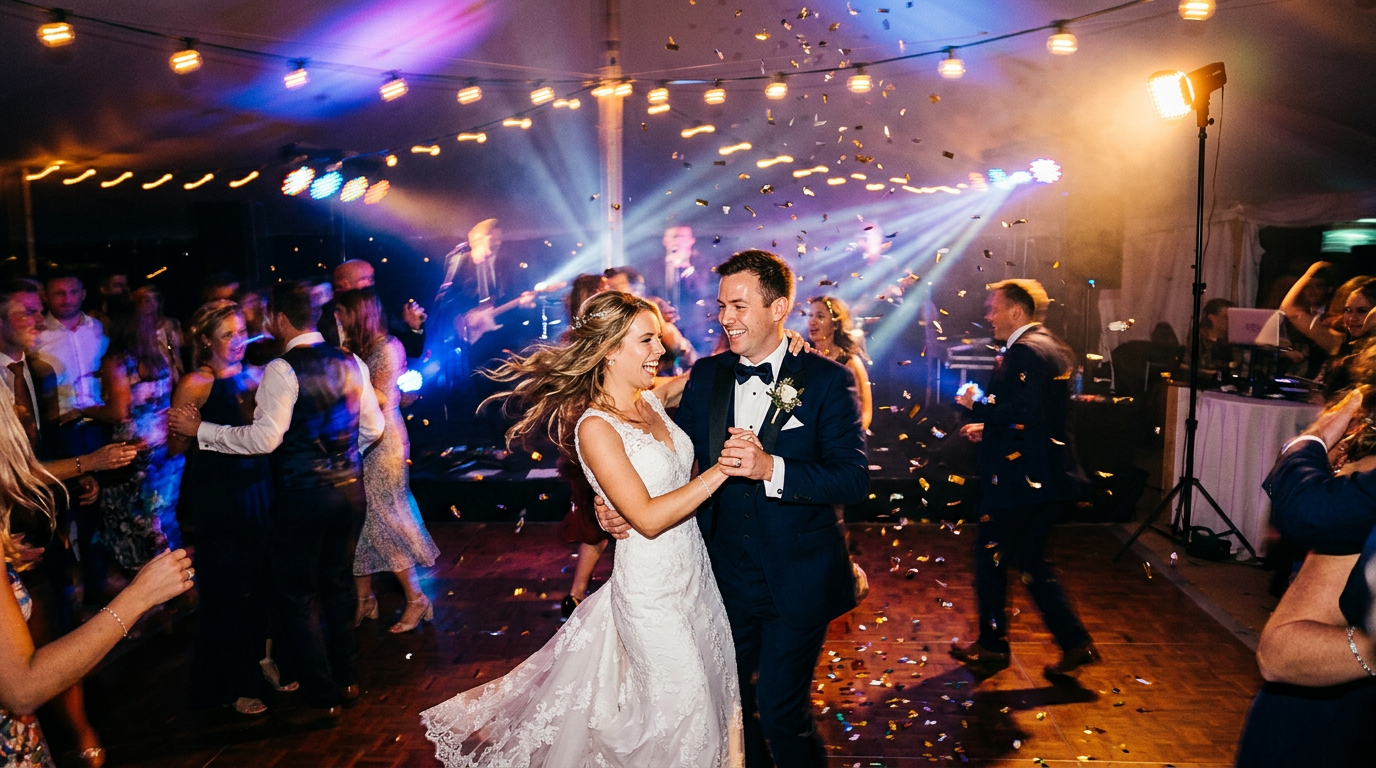
Dragging the shutter freezes the couple while the background blurs with motion and light.
Frequently Asked Questions
How do I use off camera flash at a wedding? Start with one flash 45 degrees off-axis from your subject, softened with a modifier. Use either TTL or manual settings around 1/4 power and ISO 800, then adjust from there.
What are the best settings? Manual mode: ISO 800–1600, f/2.8–f/5.6, and a shutter speed of 1/160s–1/200s. Use TTL for fast-changing light and manual for consistency.
How do I troubleshoot flash issues? Check battery levels, confirm wireless triggers are synced, keep shutter speed within sync limits, and always carry backups.
Which gear fits my budget? Budget: Godox TT685 + X2T trigger + 33-inch umbrella. Mid-range: Canon 600EX-RT + 24-inch softbox + stand. Pro: Profoto A10 with modifiers and a wireless system.
How do I balance ambient light with flash? Meter and expose for ambient light first, then add flash slightly underexposed by 1–2 stops for natural fill. Adjust as needed for balanced shots.
Once you've nailed the lighting, the final challenge is getting those beautifully lit images into your clients' hands quickly. That's where an AI-powered delivery platform like Foto Owl AI helps — its AI face recognition matches every guest to their photos and sends personalized galleries over WhatsApp automatically, so your best work reaches the couple before they even leave the venue.
Deliver your beautifully lit wedding photos in minutes
Foto Owl AI uses AI face recognition to send every guest a personalized gallery automatically — straight to WhatsApp.
Start Free Trial10,000 photos per year · No credit card required
Conclusion
Mastering off camera flash for weddings comes down to a few repeatable fundamentals: position your light 45–60 degrees off-axis, soften it with the right modifier, balance it against the venue's ambient light, and adjust your power as the room changes. Get those right and you'll deliver consistent, gallery-worthy images from the ceremony through the last dance.
Practice these techniques at your next shoot, and they'll quickly become second nature — turning challenging reception lighting into some of your most memorable work of 2026.
Have questions about your own off-camera flash setup or a tricky reception venue? Drop them in the comments below — we'd love to help you dial in the perfect lighting.