How to Embed Foto Owl Galleries in Zoho Backstage: A Step-by-Step Guide
What is FotoOwl?
FotoOwl is an AI-powered event photography platform that helps event organizers, photographers, and venues deliver, share, and monetize event photos effortlessly. With advanced face recognition technology, attendees can instantly find their photos from thousands of images in seconds — no manual tagging required.
FotoOwl transforms how events showcase memories by offering:
- AI Face Search — Attendees upload a selfie and instantly discover all their photos
- Embeddable Galleries — Seamlessly integrate live photo feeds into any website, including Zoho Backstage
- Photo Selling — Monetize your event photography with built-in e-commerce features
- Real-time Uploads — Share photos as the event happens, creating instant engagement
- QR Code Access — Guests scan and access their personalized photo gallery immediately
Whether you're running conferences, weddings, sports tournaments, or corporate events, FotoOwl provides a white-label solution that elevates the attendee experience while saving hours of manual work.
📌 In this guide, you'll learn how to embed your FotoOwl gallery directly into your Zoho Backstage event microsite using a simple iframe widget — no coding experience needed. The process takes less than 10 minutes from start to finish.
Step 1: Generate Your Embed Code in Foto Owl
Before heading over to Zoho Backstage, you first need to generate the unique embed snippet for your event from the Foto Owl dashboard. The entire process takes less than two minutes and gives you a ready-to-paste iframe code that works on any website builder — including Zoho Backstage.
Follow the sub-steps below to grab your code. Each step includes a screenshot so you can follow along easily.
1.1 — Log In to Foto Owl
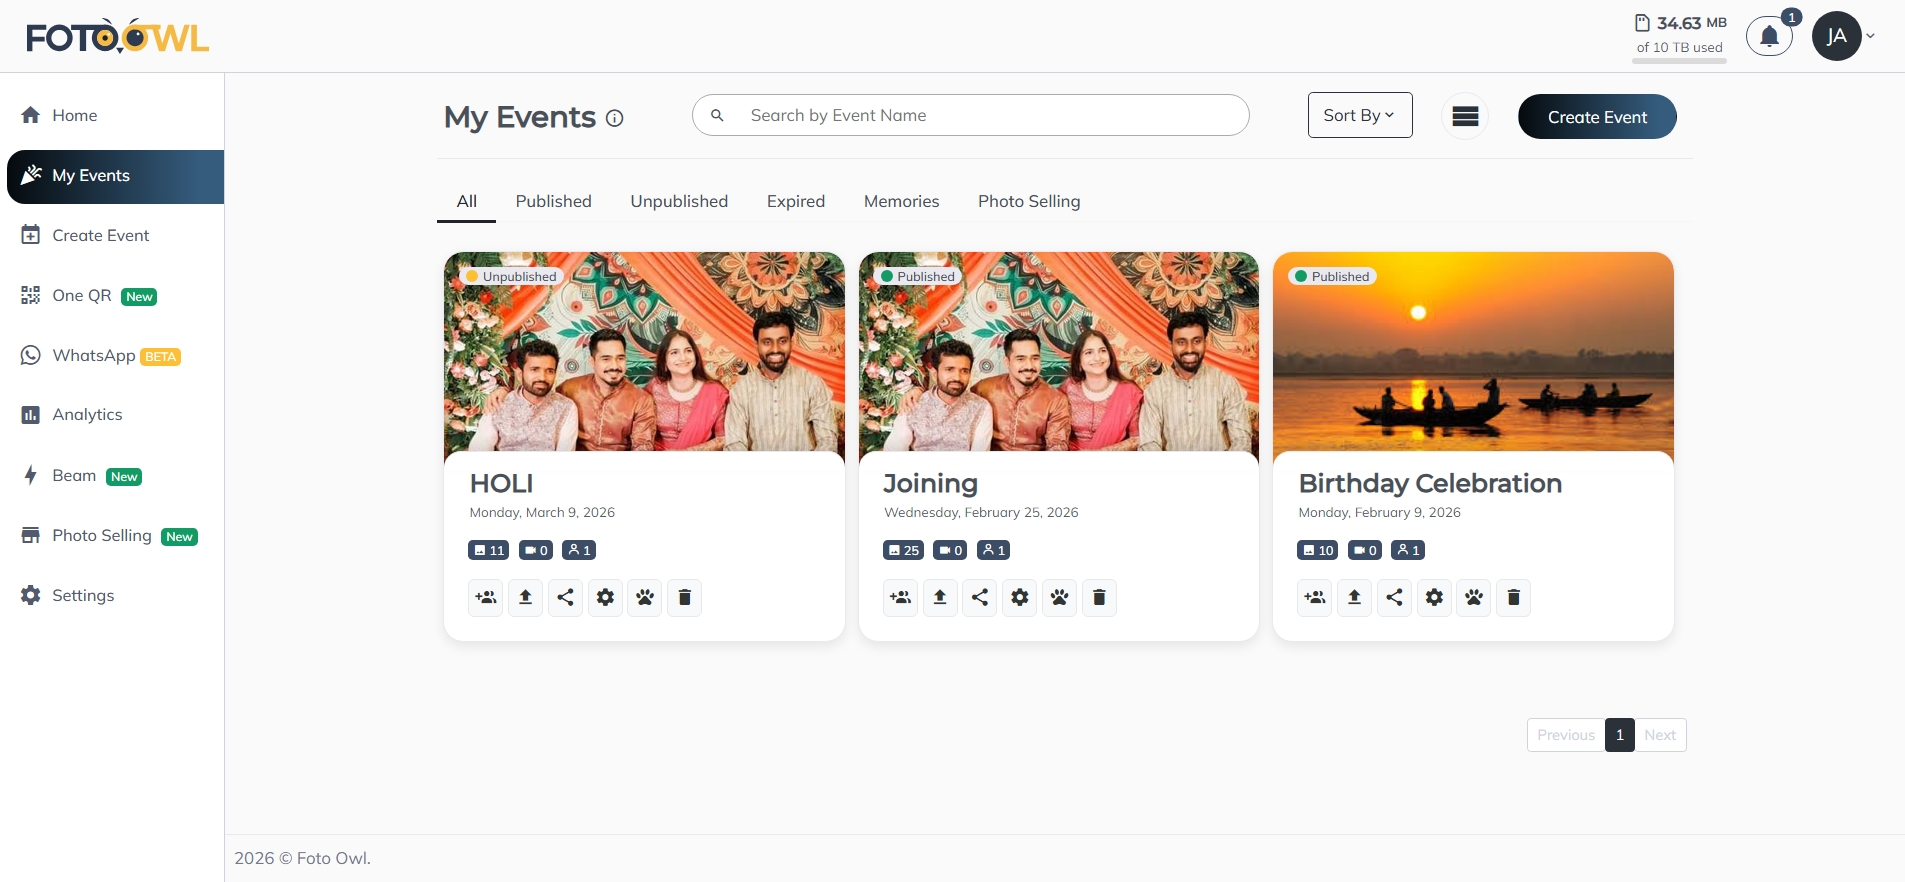
Head over to fotoowl.ai/login and sign in with your account credentials. If you don't have an account yet, you can sign up for free — no credit card required. Once logged in, you'll land on the Foto Owl Dashboard where all your events are listed.
1.2 — Create or Select Your Event
From the dashboard, click "Create Event" in the left sidebar to start a new event. Fill in the Event Name, Start Date, End Date, Event Type, and optionally an Event Location and Description. You can also enable features like Photo Selling or Reelit AI right from this screen. If you already have an existing event, select it from "My Events" instead.
Once the event details are set, click "Next: Select Design" in the bottom-right corner to proceed. Make sure the event already has photos uploaded — this is what your attendees will see in the embedded gallery.
1.3 — Open the Share Event Panel
Inside your event, click the "Share Event" button located in the top navigation bar. A sharing panel will slide open, presenting you with multiple ways to distribute your event gallery — via direct link, QR code, or embed code.
From the available options, select "Embed in your Website". This is the option specifically designed for integrating your gallery into third-party platforms like Zoho Backstage, WordPress, Wix, and more.

1.4 — Configure & Copy Your Iframe Code
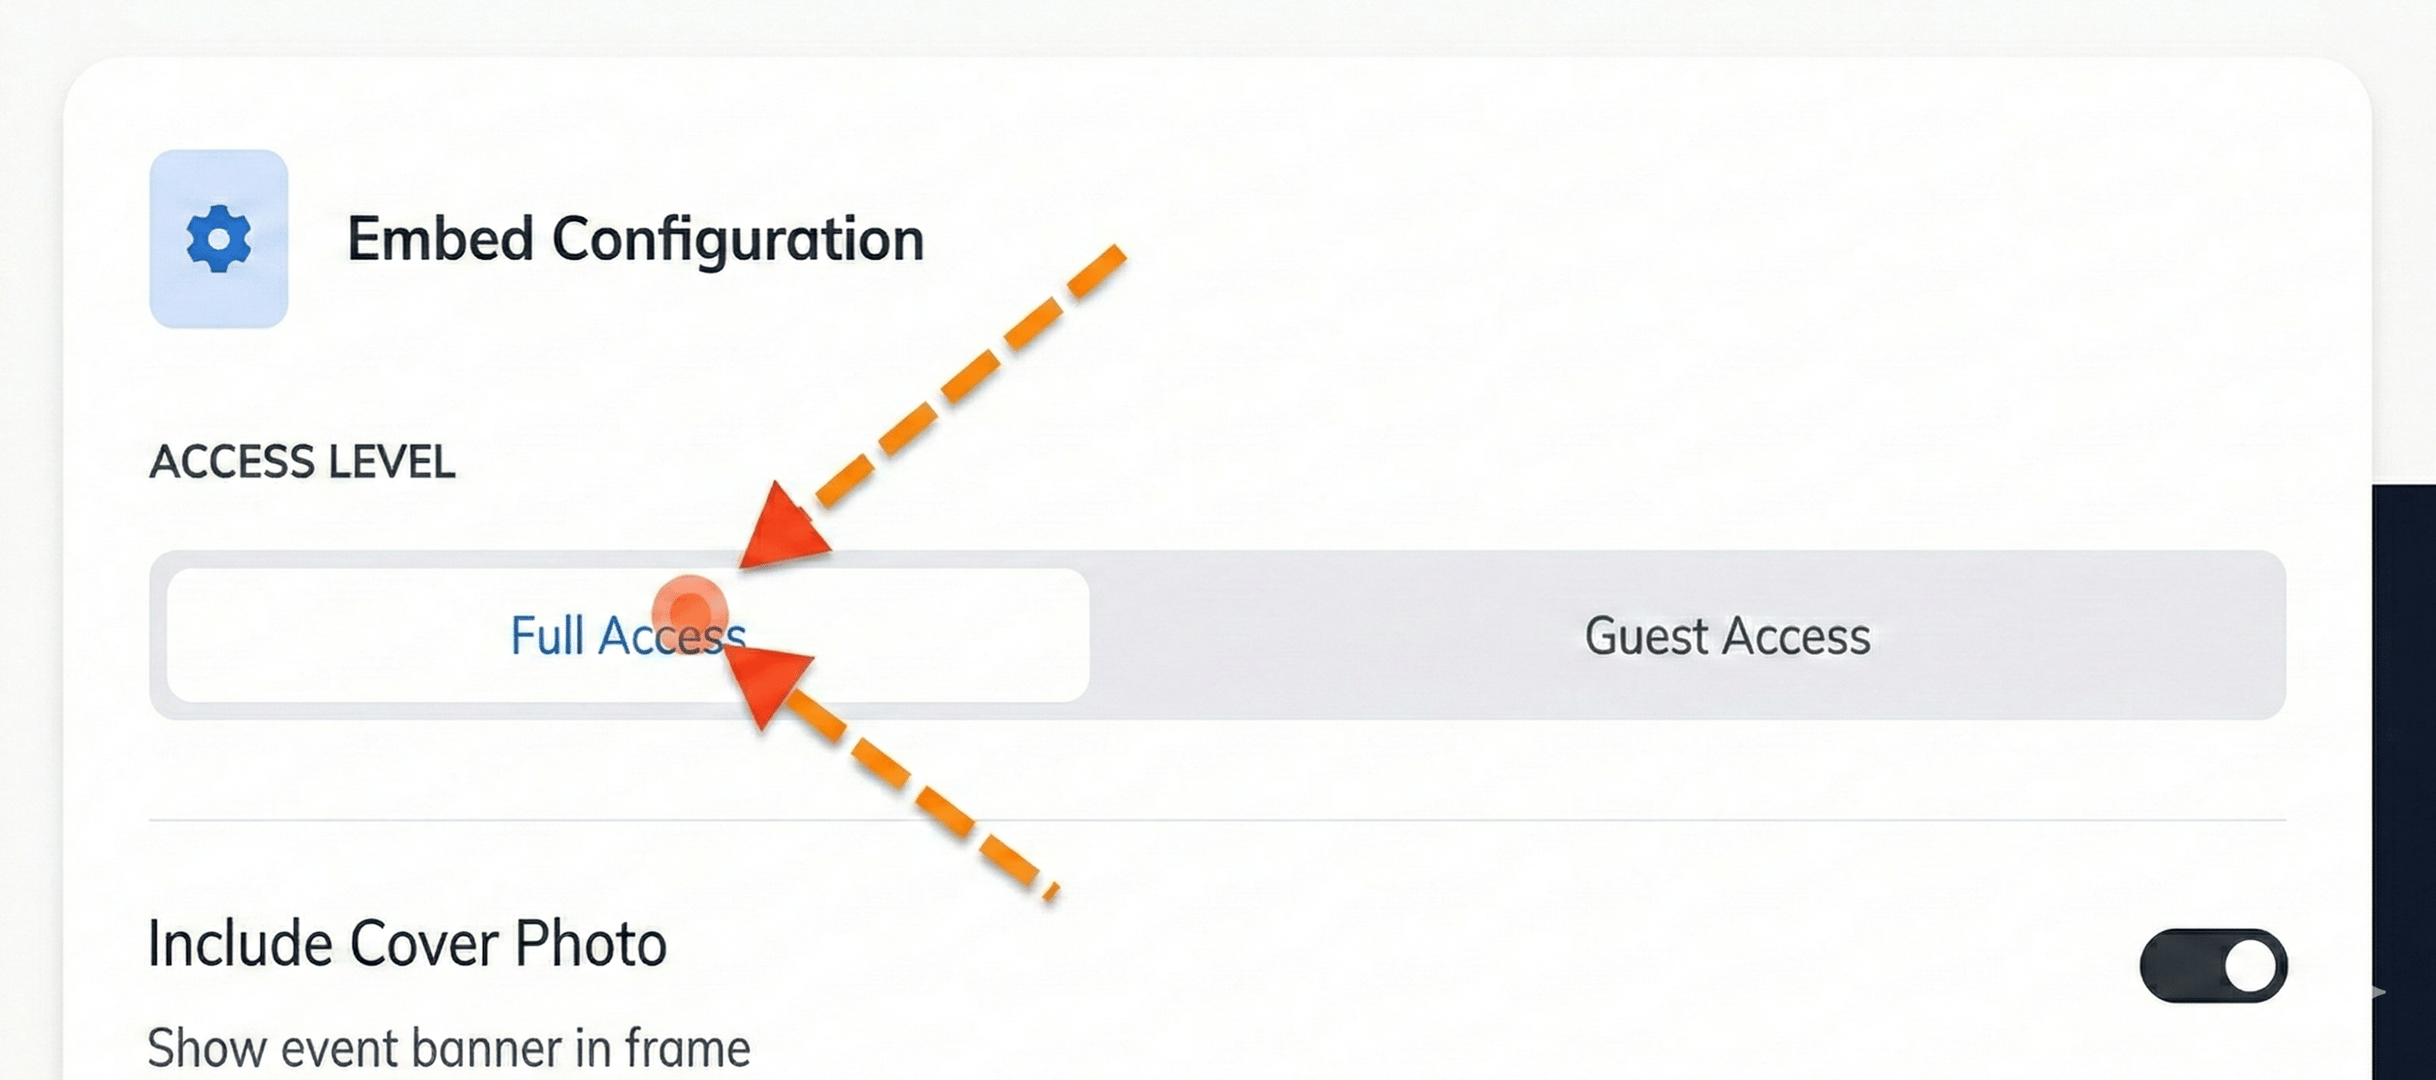
Before copying, you can fine-tune two important settings to control how the gallery appears on your Zoho page:
- Access Level — Choose Full Access for an interactive experience where attendees can search by face, download photos, and explore freely. Or pick Guest Access for a simpler, view-only gallery.
- Cover Photo — Toggle this on if you want the event banner to appear at the top of the embedded gallery, or turn it off for a cleaner, photo-grid-only look (recommended for Zoho Backstage).
Once you're satisfied with your configuration, click the "Copy Iframe Code" button. The snippet is now saved to your clipboard and ready to paste into Zoho Backstage.
After copying, you can paste the code into any text editor to verify it looks correct. It should be a single <iframe> tag with your unique event URL inside the src attribute.
Step 2: Embed into Zoho Backstage
Now that you have your Foto Owl iframe code safely copied to your clipboard, it's time to head over to Zoho Backstage and place it on your event microsite. The process is straightforward — Zoho's drag-and-drop microsite builder already includes a dedicated Embed Widget section type that is perfect for third-party iframes like ours.
Below, we'll walk through each sub-step in detail so you can get the gallery live in under five minutes. Each step includes a screenshot so you can follow along visually, even if you've never customized a Zoho Backstage microsite before.
2.1 — Open the Microsite Builder
Log in to your Zoho Backstage account and follow these steps to access the builder:
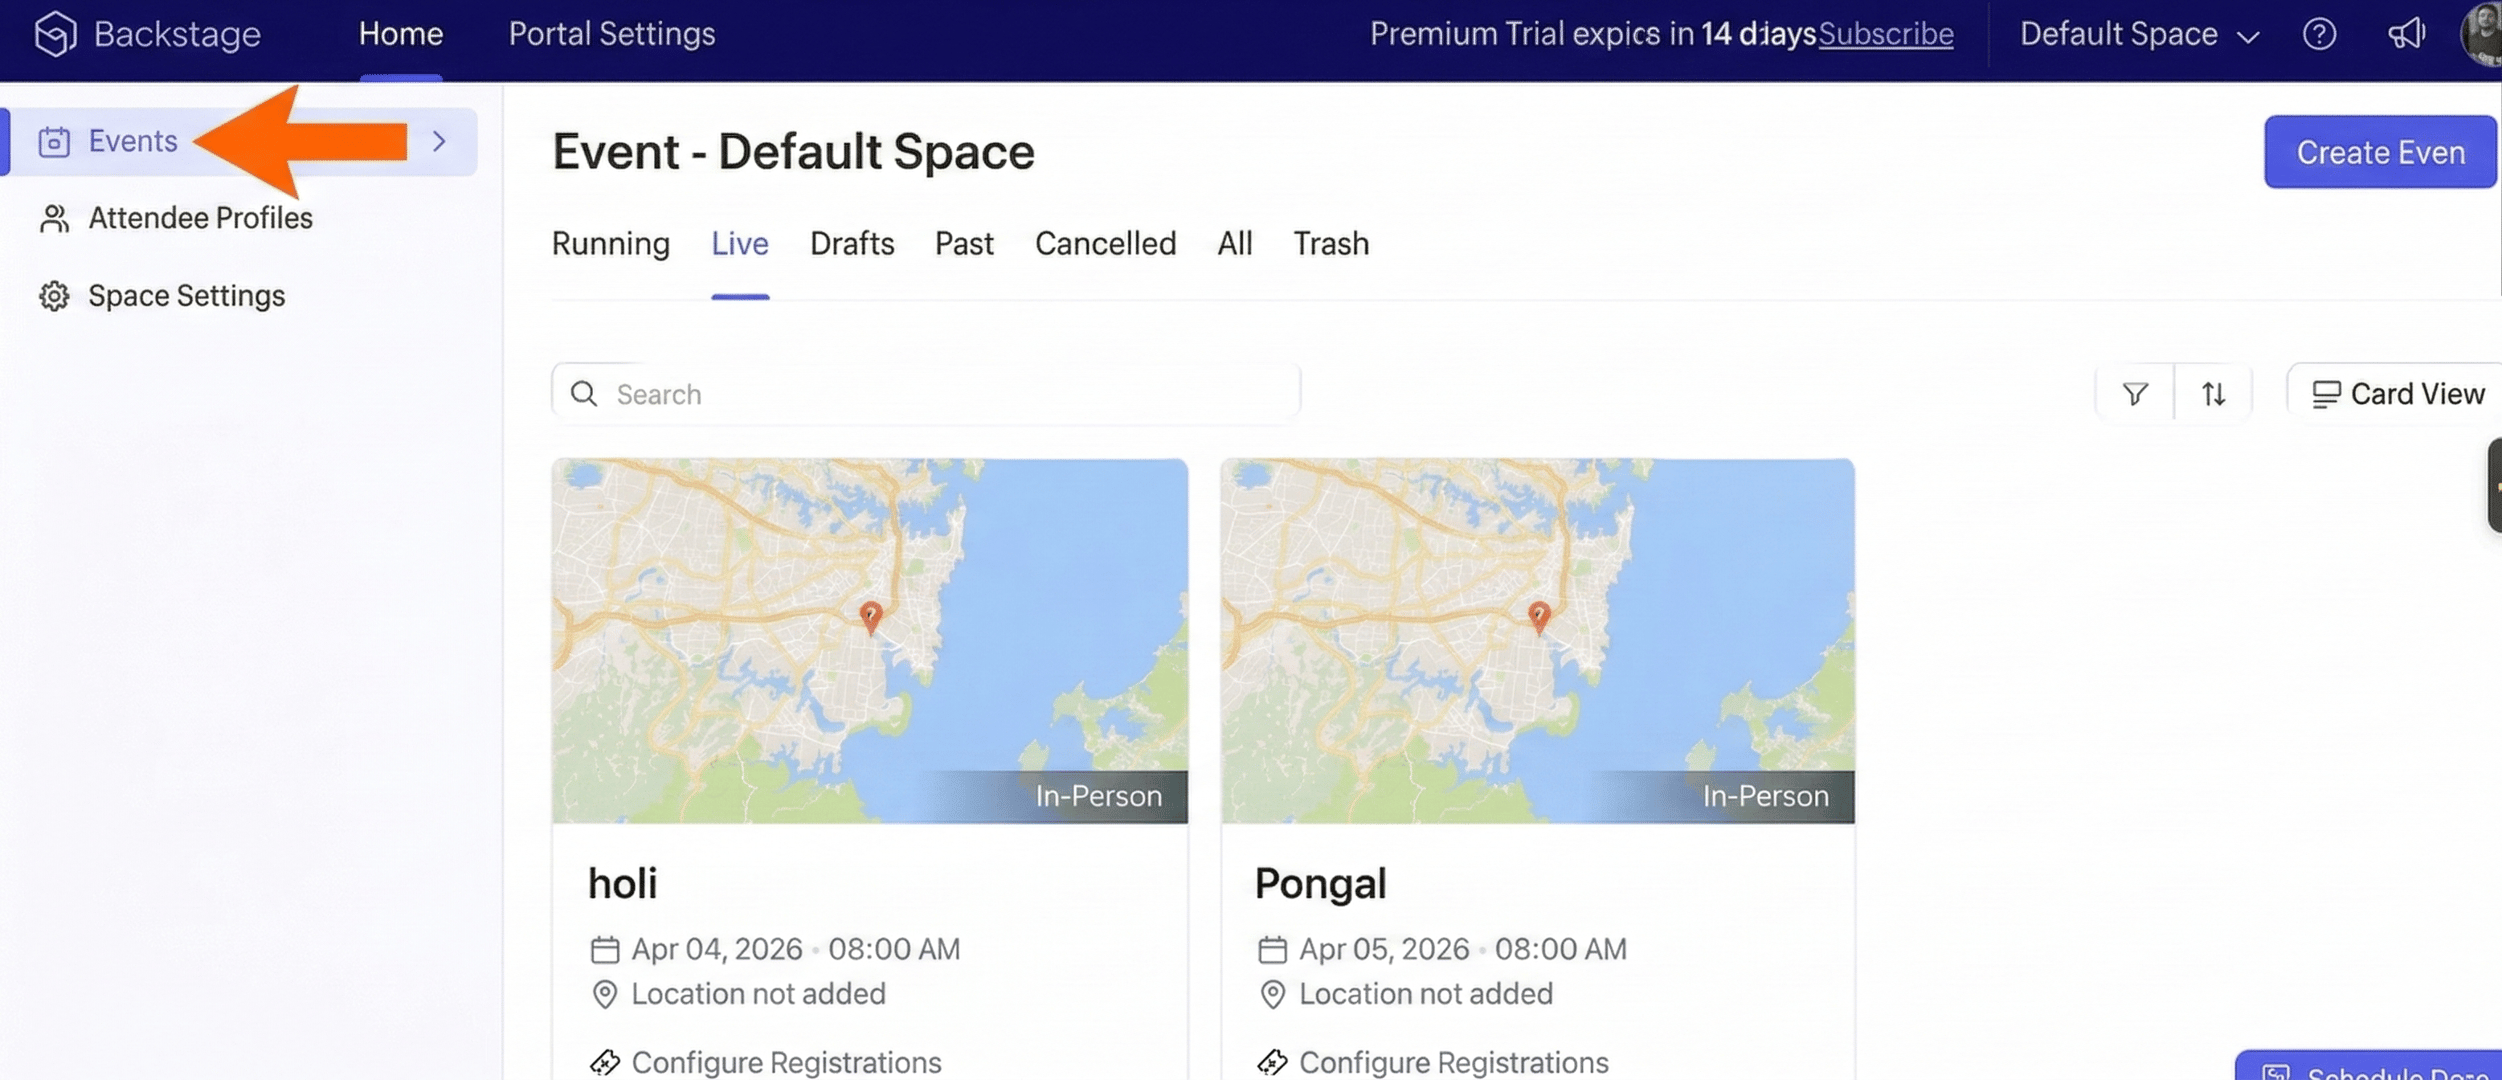
- Go to Events: From the main portal sidebar, click on the Events tab to see your event list.
- Select Your Event: Choose the specific event you want to enhance (e.g., "Pongal" or "holi") from the dashboard.
This opens the visual builder interface where you can begin adding your custom widgets.
2.2 — Navigate to Website Design
Once you have selected your specific event, follow these steps to reach the design settings:
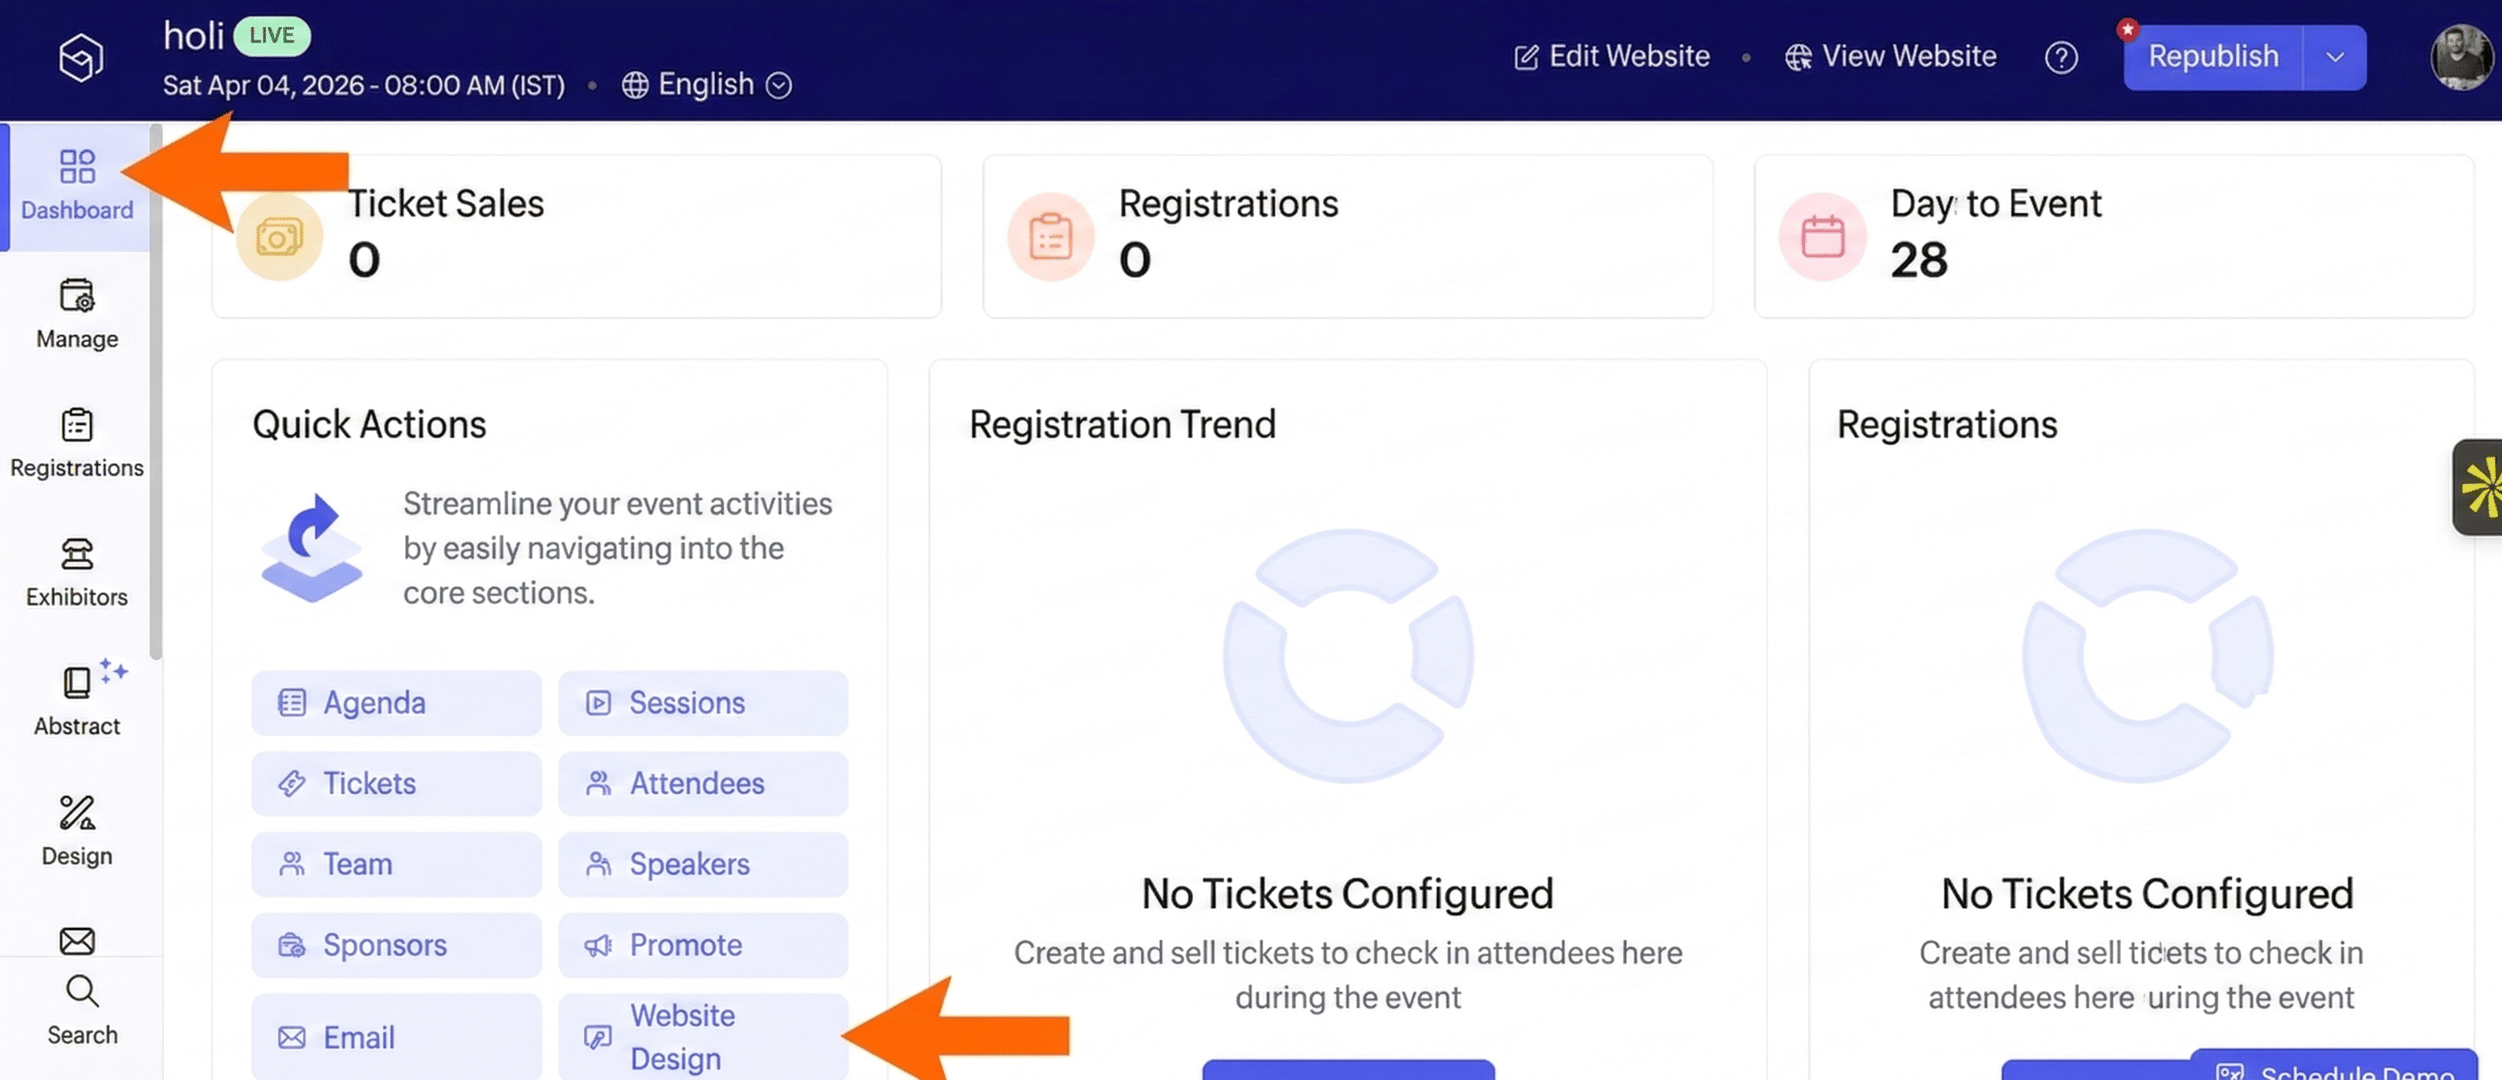
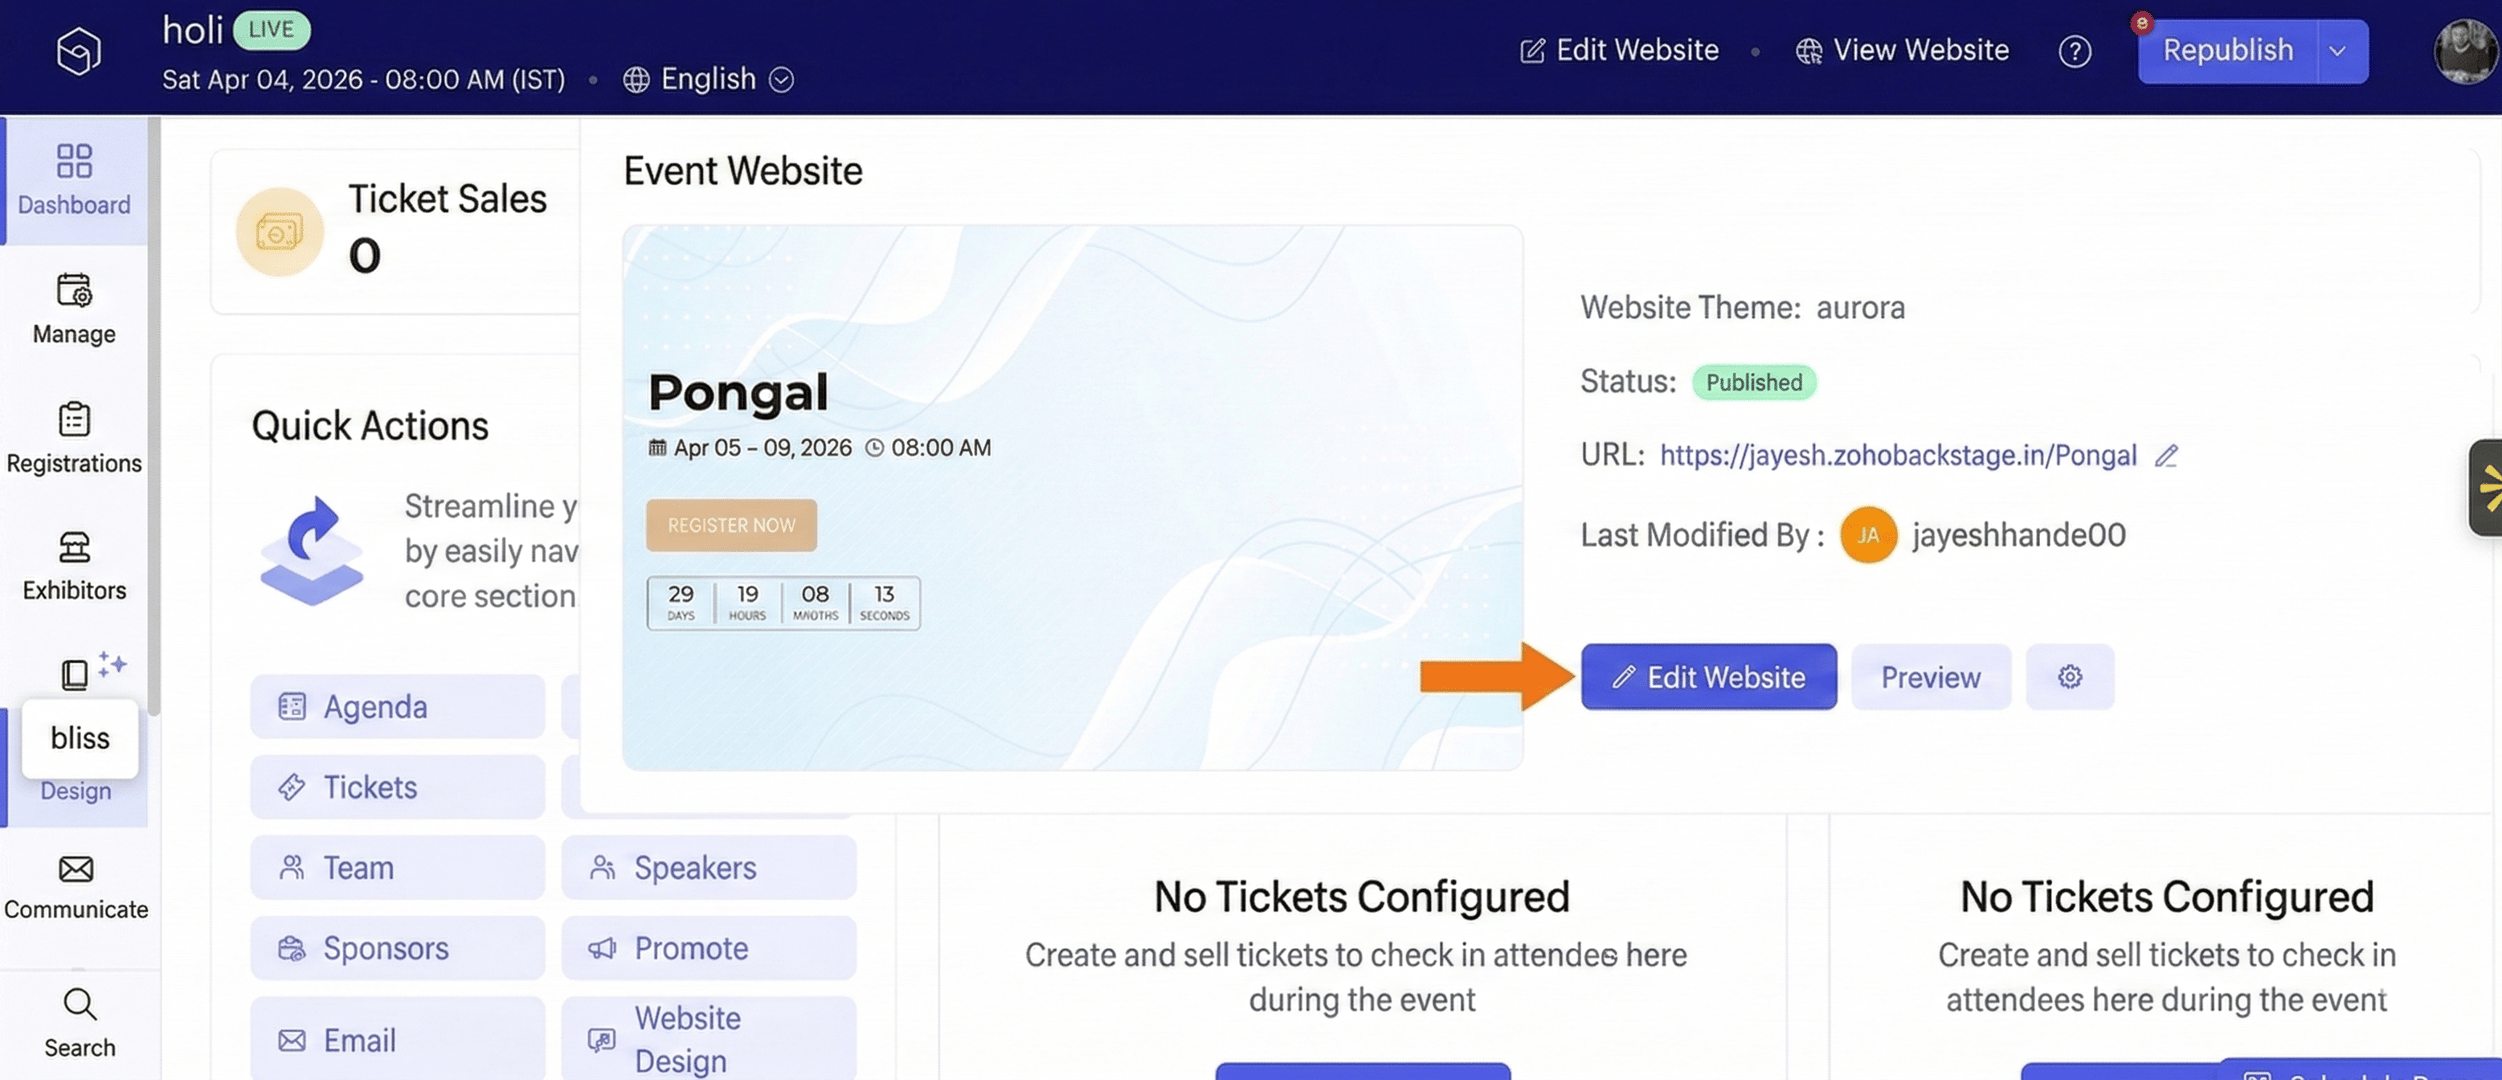
- Open the Dashboard: Ensure you are on the main Dashboard view for your chosen event.
- Select Website Design: Under the Quick Actions section in the center of the dashboard, click on the Website Design button.
- Alternative Navigation: You can also reach this section by clicking the Design icon in the far left-hand sidebar menu.
This will take you to the Event Website overview page where you can manage your site's theme and publishing status.
2.3 — Launch the Visual Builder
Once you are on the Event Website overview page:
- Open the Editor: Locate and click the blue Edit Website button.
This action will take you directly into the visual microsite builder, where you can begin customizing your event page and adding new media elements.
2.4 — Add Your Media Component
Once the visual builder has loaded your event page:
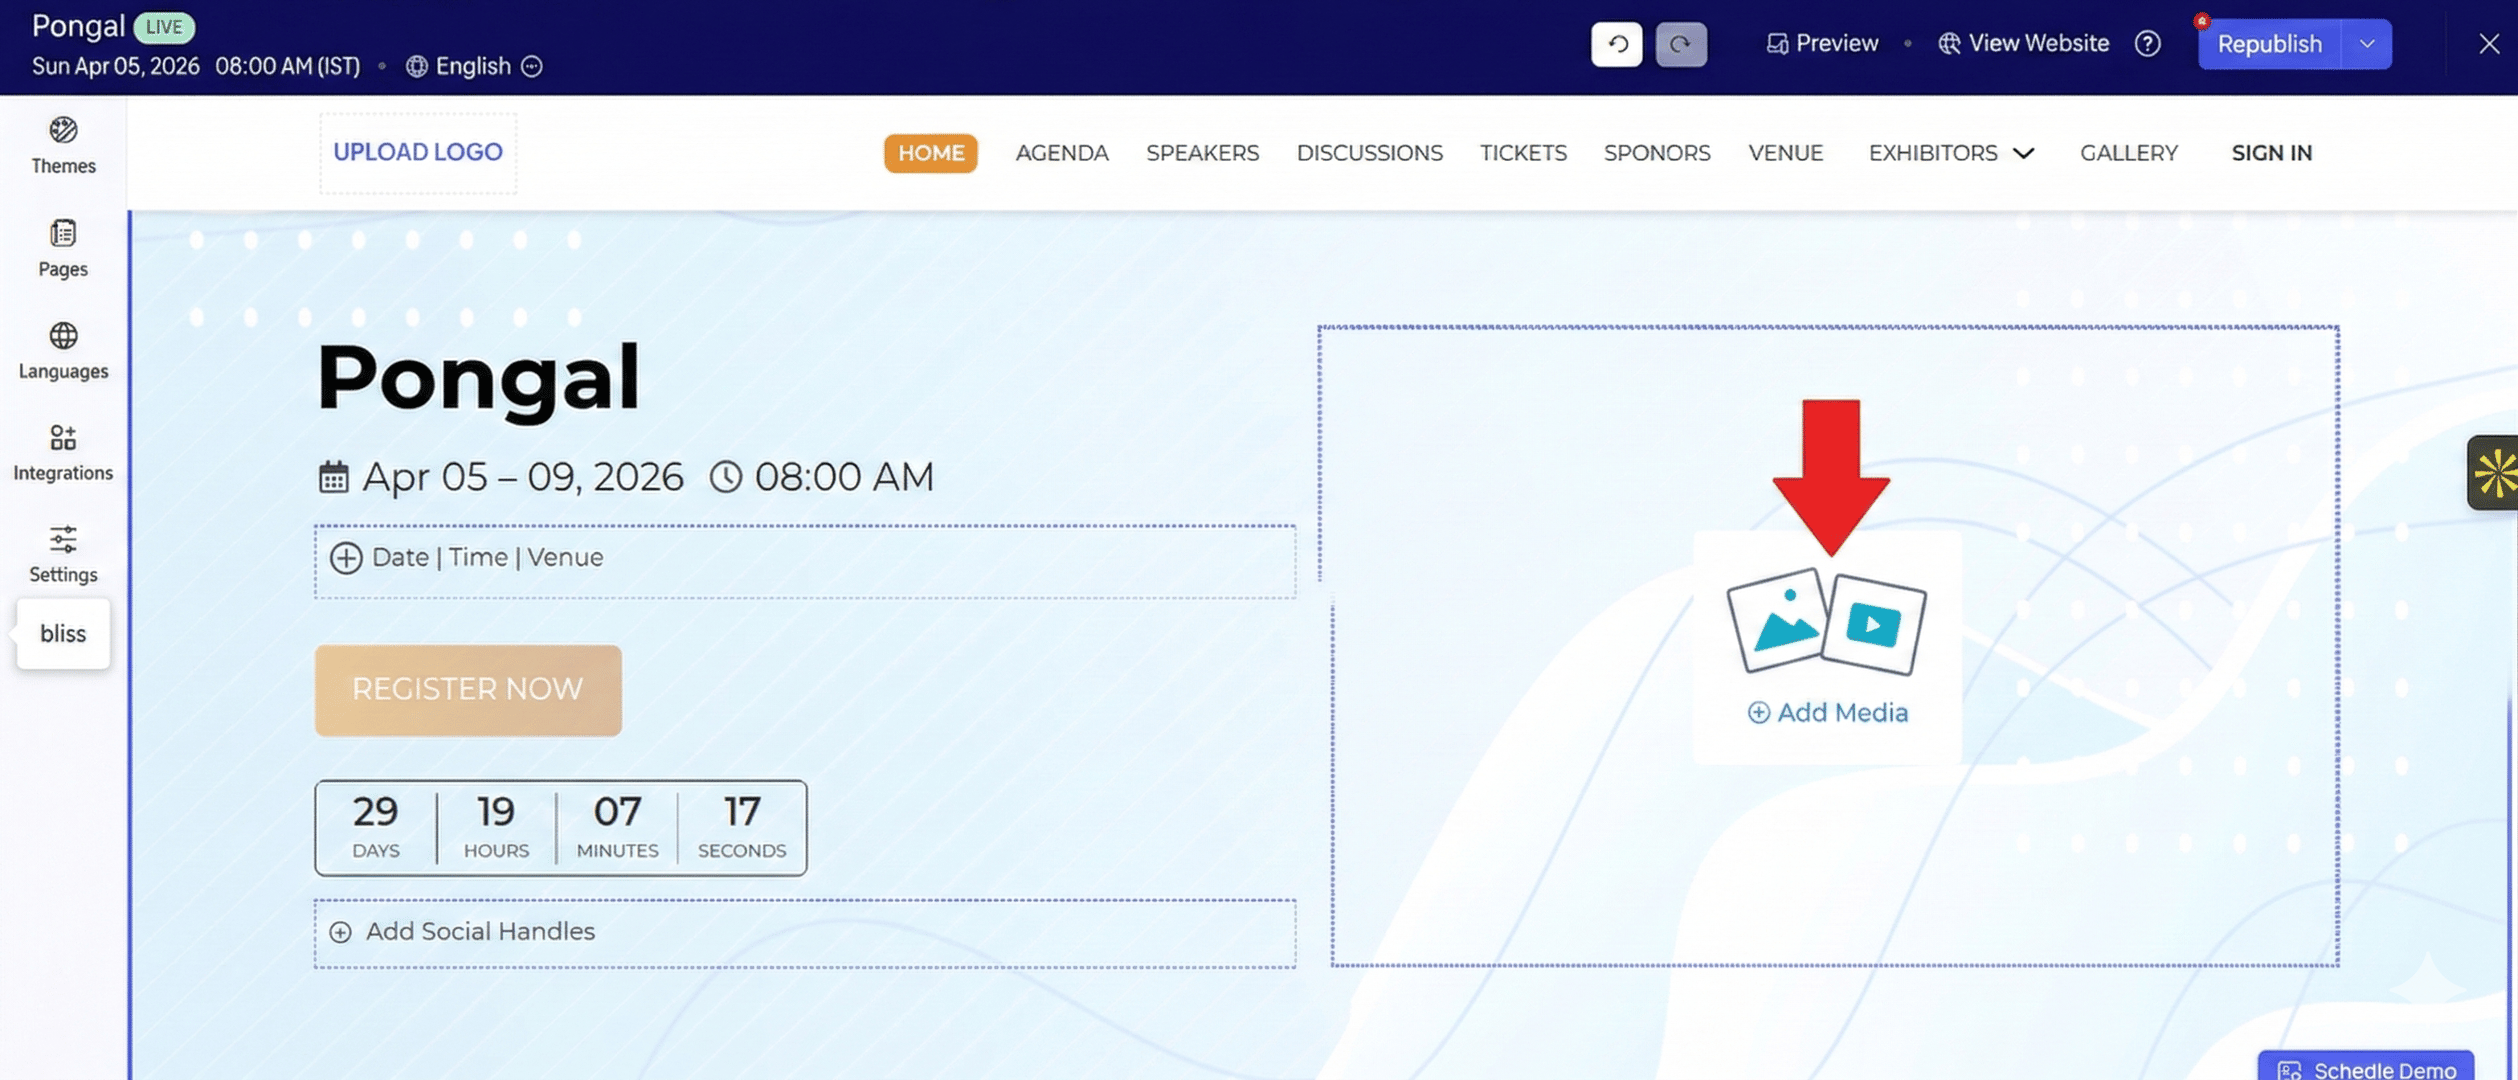
- Locate the Media Section: Find the section on your page where you want to display your gallery.
- Click Add Media: Click on the Add Media icon (indicated by the image and video placeholders) to open the media selection menu.
This will bring up the sidebar options for uploading direct images, videos, or using an external embed code.
Always use width="100%" instead of a fixed pixel value. This ensures your gallery looks great on desktops, tablets, and mobile devices alike. If the gallery appears too short, increase the height value to 1000px or more.
2.5 — Embed the Foto Owl Gallery
After selecting the media component, you can now link your external gallery:
- Select Embed: In the "Add Media" sidebar, click on the Embed tab.
- Paste Your Code: Locate the input field labeled "Paste your iframe code".
- Insert Snippet: Paste the iframe code snippet you copied from your Foto Owl dashboard into this box.
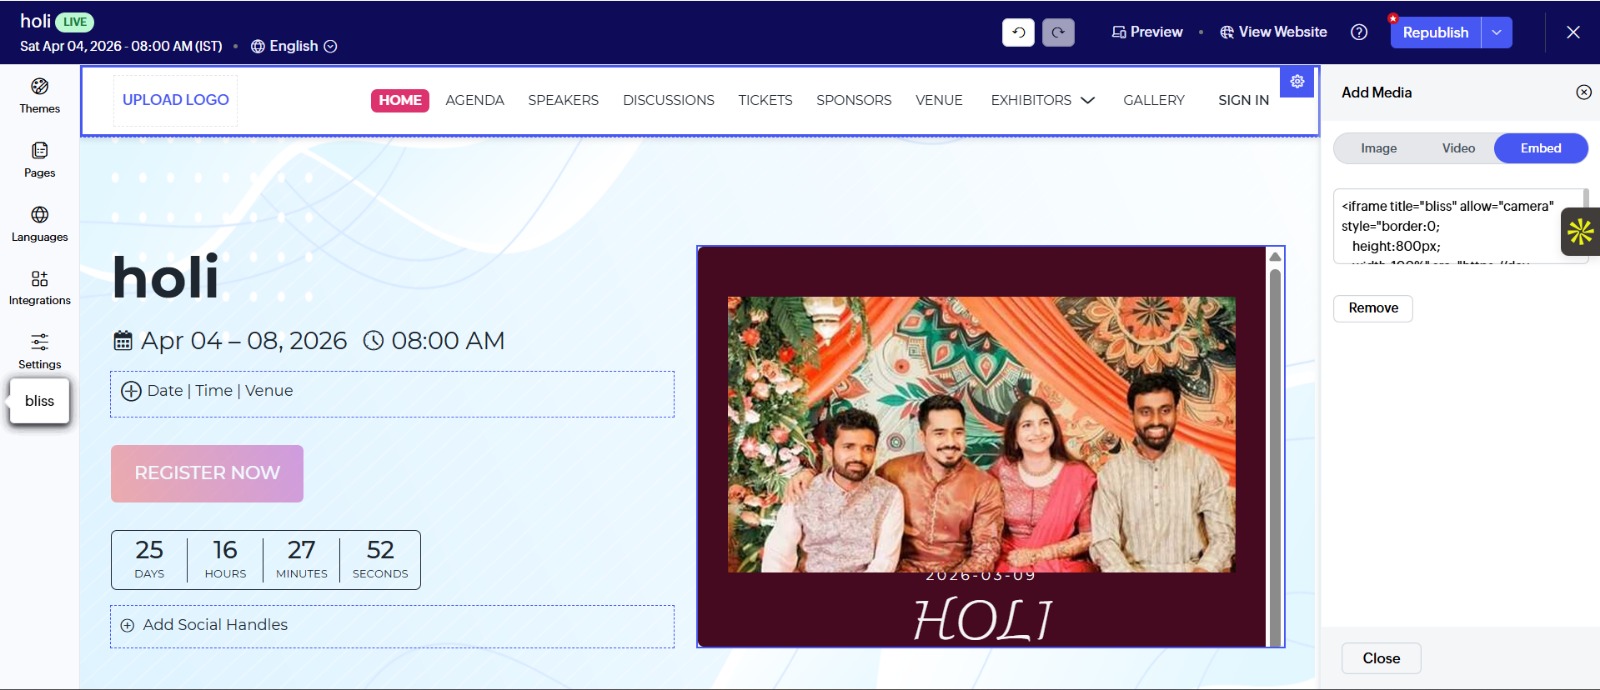
Once pasted, the builder will automatically fetch your gallery and display a live preview on your event microsite.
<iframe src="https://gallery.fotoowl.ai/your-event-id" width="100%" height="800px" frameborder="0" allowfullscreen></iframe>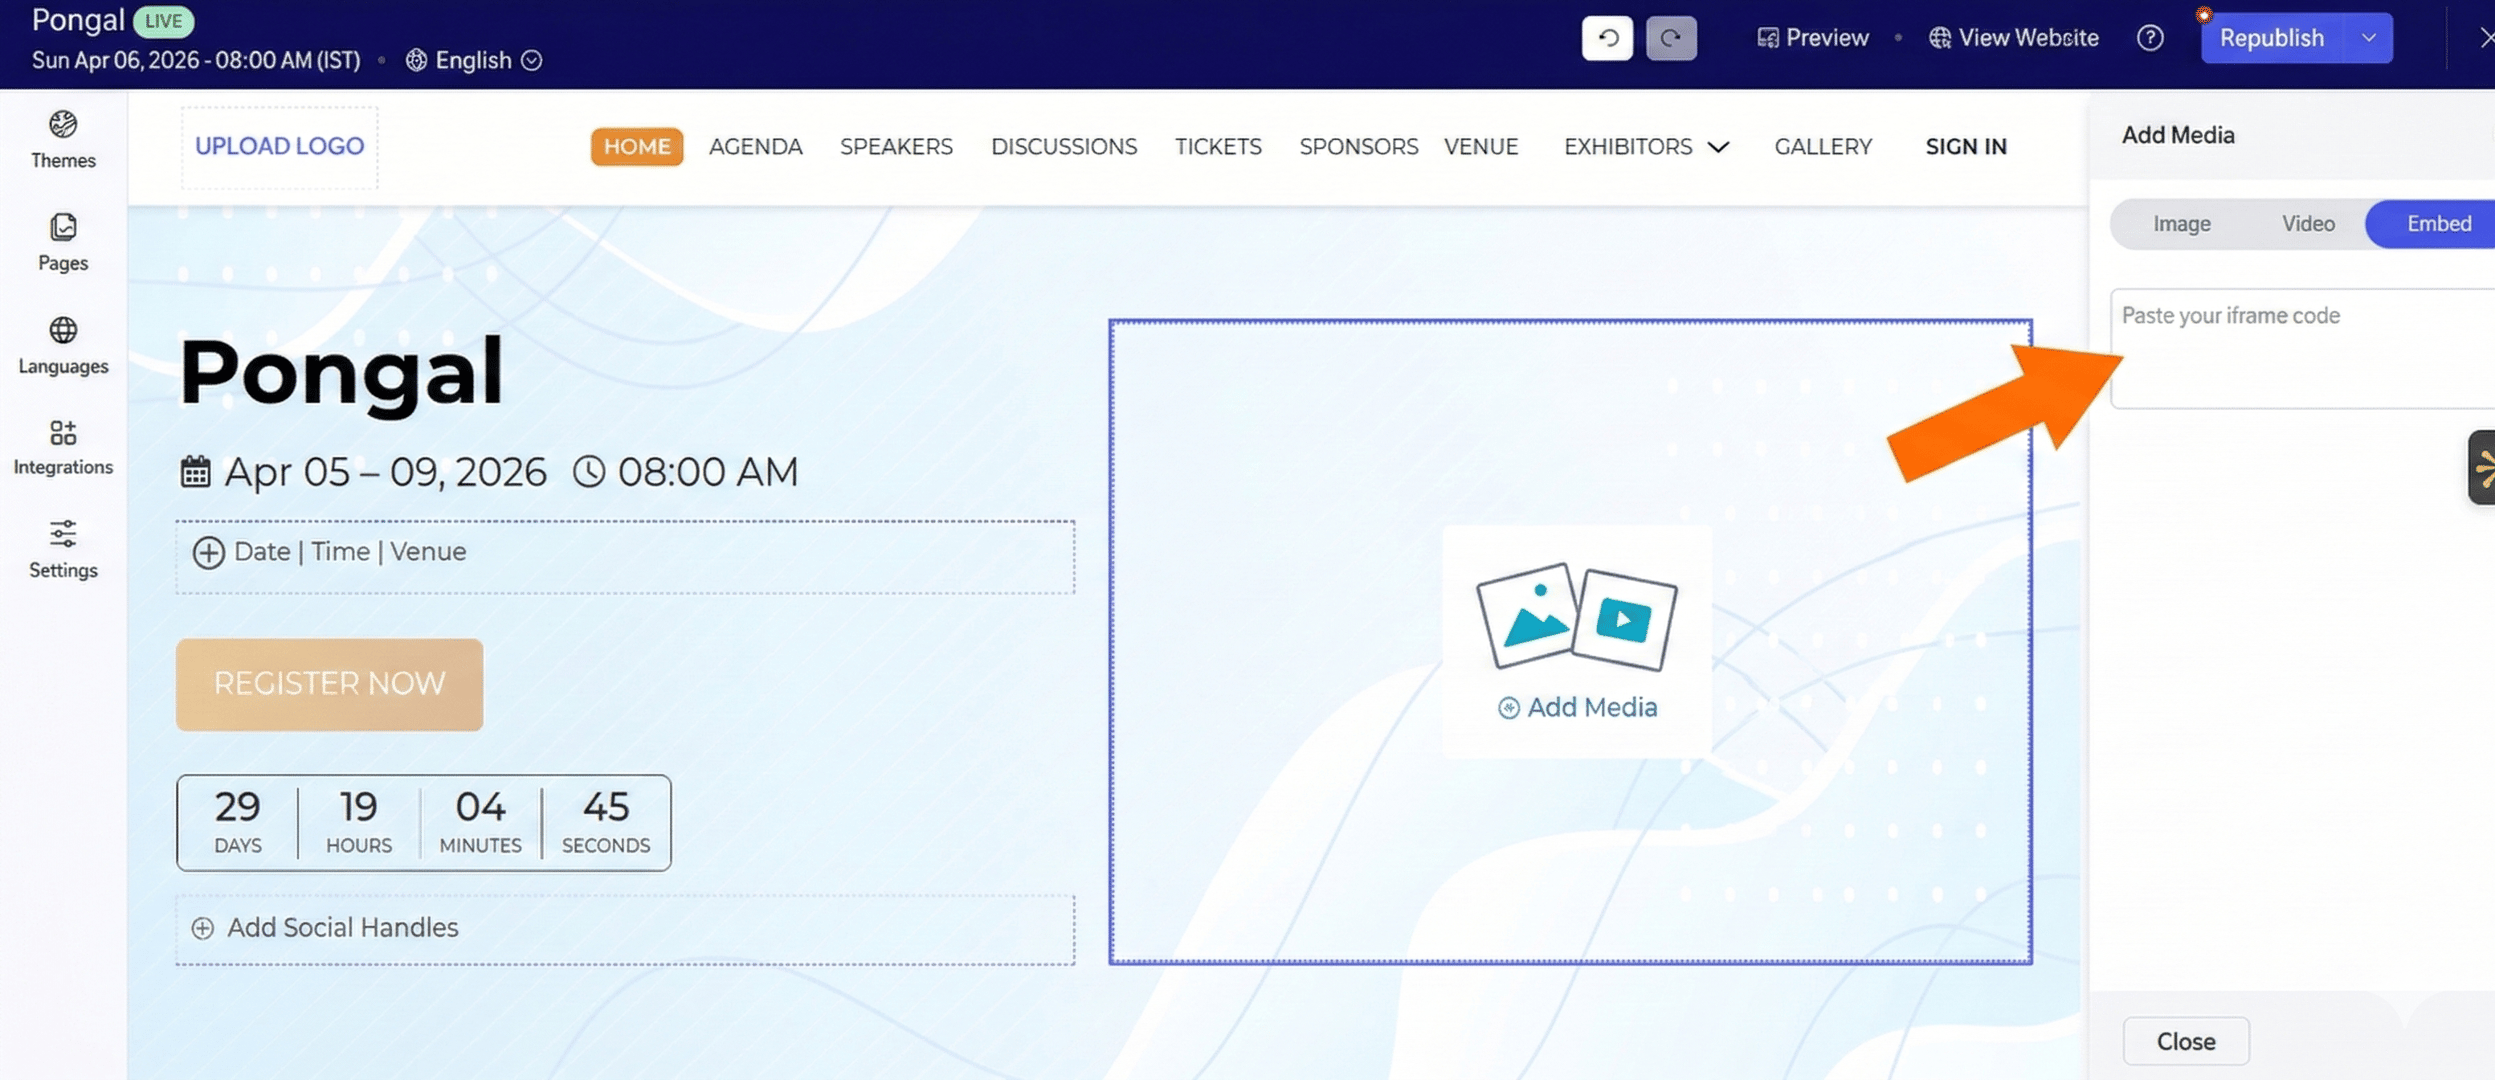
2.6 — Save & Publish Your Microsite
Once you're happy with the placement and the code, click "Save" in the top-right corner of the builder. You can preview the page to verify the gallery loads correctly and scrolls smoothly. When everything looks perfect, hit "Publish" to push the changes live.
Your attendees will now see a fully interactive, AI-powered photo gallery right inside your Zoho Backstage event website — no redirects, no extra logins, just a seamless experience.
💡 Pro Tip for Zoho Users
If you want the gallery to appear as a full-screen, immersive experience, choose the "Without Cover Photo" option in Foto Owl before copying the embed code. This removes the event banner from the iframe and lets the photo grid blend seamlessly with your Zoho Backstage theme — perfect for a clean, professional look.