
Camera Settings for Low Light Event Photography (2026)

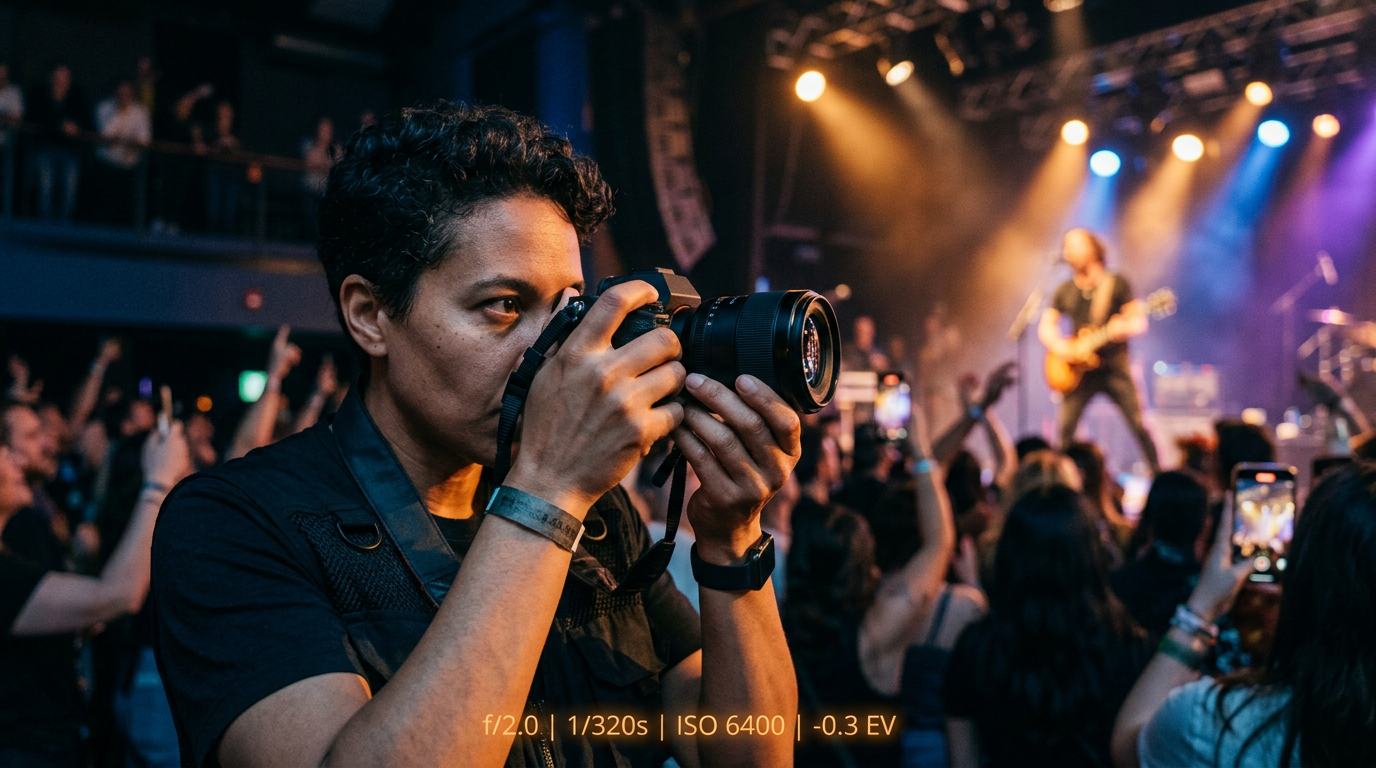
A photographer navigating challenging low light at a live event — the scenario every event shooter knows well.
Quick take: The right camera settings for low light event photography come down to three pillars — a wide aperture (f/1.4–f/2.8), a controlled ISO (800–3200), and a shutter speed fast enough to freeze motion (1/125s or faster). Master these, and dim venues become your creative playground.
Quick Answer
For sharp low light event photos, shoot with fast prime lenses (f/1.4–f/2.8), keep ISO between 800–3200, use a shutter speed of at least 1/125s for moving subjects, and shoot in manual mode with RAW enabled. This guide breaks down every setting, lens choice, and flash-free technique you need.
In This Article:
- Why Low Light Event Photography is Tough
- Essential Camera Settings for Low Light Events
- Recommended Lenses for Low Light Events
- Using Tripods and Stabilization
- Shooting Without Flash: Tips & Alternatives
- Manual Mode: Take Full Control
- Post-Processing Low Light Images
- Final Thoughts
Getting the right camera settings for low light event photography is the difference between a portfolio-worthy shot and a noisy, blurry miss. Whether you're shooting a wedding reception under string lights, a corporate gala in a dim ballroom, or a concert with unpredictable stage lighting, the challenges are the same: not enough light, too much motion, and almost no time to think.
This 2026 guide walks you through everything you need to know — from nailing your exposure triangle and choosing the right glass to mastering manual mode and working creatively without flash. By the end, low light won't feel like a limitation. It'll feel like an opportunity.
1. Why Low Light Event Photography is Tough
Shooting in low light isn't just about darkness — it brings a bundle of interconnected technical challenges that compound each other.
Less light hits your sensor, so you need to open your aperture wide, slow your shutter speed, or raise ISO — each with trade-offs. High ISO introduces noise that eats away at detail and color fidelity. Slow shutter speeds risk motion blur when people move or you shoot handheld. And autofocus systems struggle in the dark, often hunting or missing altogether.
On top of that, lighting conditions change rapidly at events. You might go from a spotlight-lit stage to ambient candlelight within seconds, sometimes in venues with strict no-flash policies. You have almost no time to adjust settings because events keep moving — and missed moments don't come back.
Understanding these challenges upfront helps you prepare your camera setup and shooting approach before the event even starts.
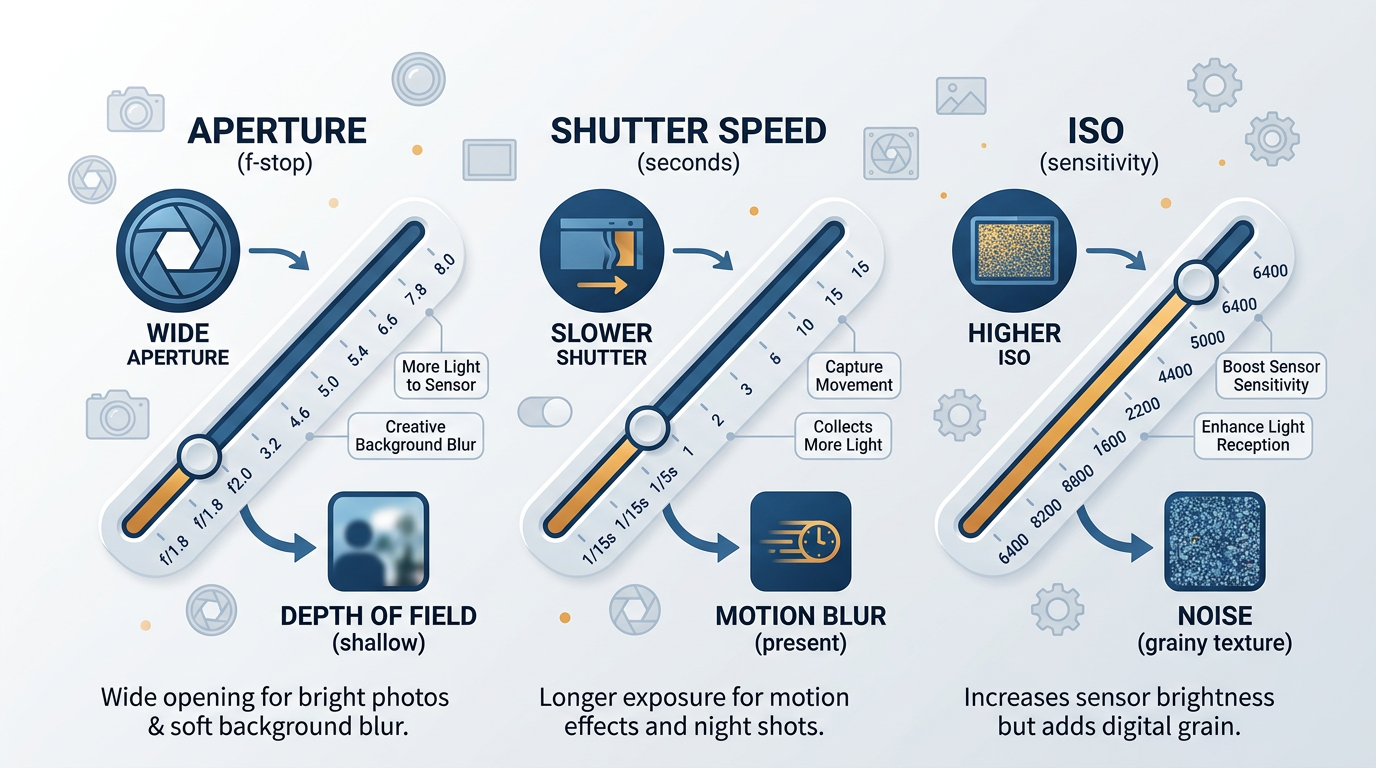
The exposure triangle in low light — every adjustment to one setting demands a compensating shift in the others.
2. Essential Camera Settings for Low Light Events
Aperture: Let the Light In
Use lenses with wide apertures — ideally between f/1.4 and f/2.8 — to gather as much light as possible.
f/1.4 gives you maximum light but an extremely shallow depth of field, which means only a razor-thin slice of your frame will be in focus. f/1.8 is still very bright with a slightly deeper focus area — a sweet spot for single-subject portraits. f/2.8 offers a good balance for group shots where you need enough depth of field to keep multiple faces sharp while still letting in adequate light.
Keeping aperture wide helps compensate for low light, but choosing the right depth of field is key depending on your shot — solo portraits versus group moments demand different approaches.
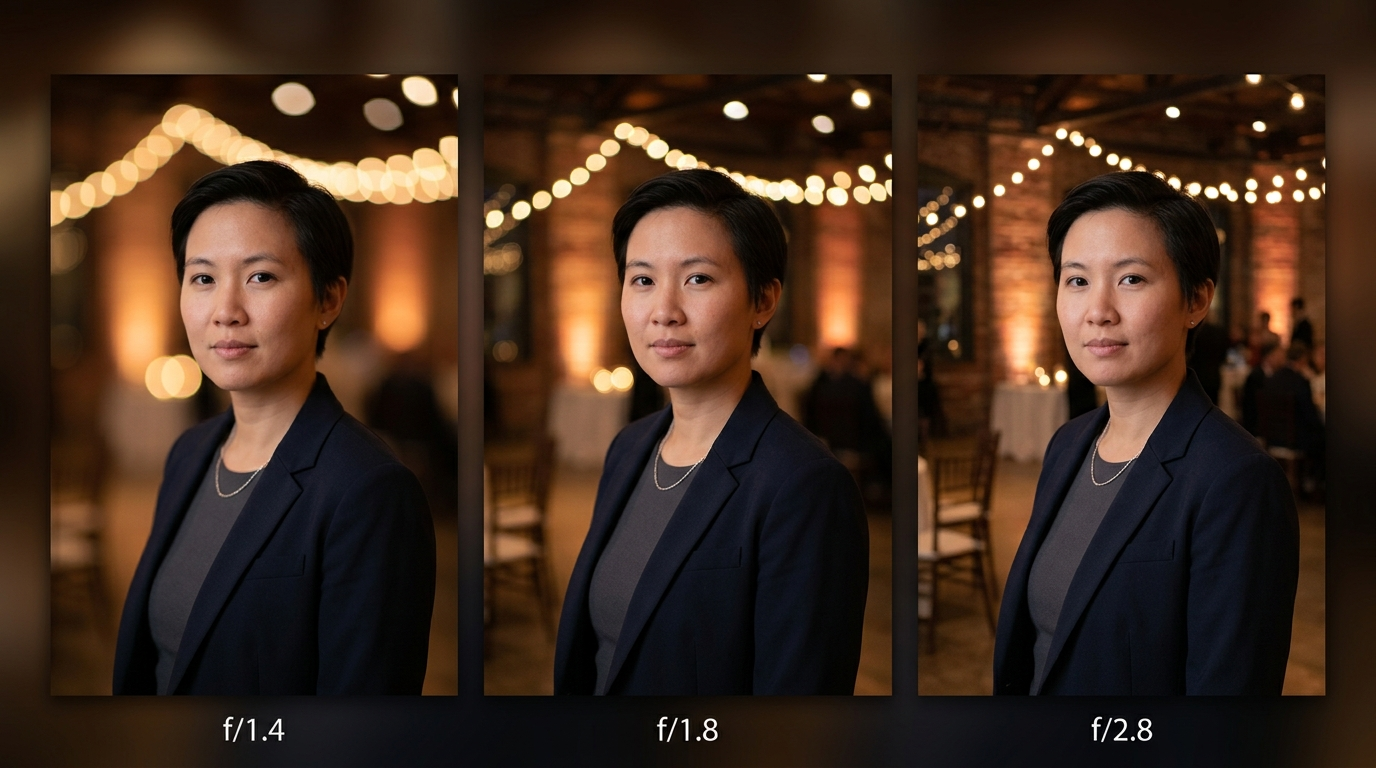
Depth of field comparison — f/1.4 isolates one subject sharply, f/2.8 keeps a group in focus, f/1.8 splits the difference.
ISO: Balancing Sensitivity and Noise
Modern cameras handle high ISOs impressively, but every model has limits.
ISO 800–1600 is the safe zone for most full-frame cameras — clean files with minimal noise. ISO 3200–6400 is still very usable, especially with post-processing noise reduction applied carefully. Going above ISO 6400 should be reserved for emergencies only — when missing the shot is worse than dealing with heavy grain.
The best approach is testing your specific camera body beforehand. Shoot test frames at different ISOs to identify the point where noise becomes unacceptable for your output needs — prints tolerate more noise than close-cropped digital delivery.
Shutter Speed: Freezing or Embracing Motion
Your minimum shutter speed depends entirely on what your subjects are doing. At least 1/60s works for handheld shots of mostly static subjects — a speaker at a podium, for example. 1/125s or faster handles walking, small gestures, and moderate movement. 1/250s and above is what you need for active dancing, sports, or fast-moving action.
Slower speeds invite blur, but some intentional motion blur can add energy and atmosphere to your shots if used creatively — especially for dance floors or concert crowds.
Focus Mode and Metering
Use single-point autofocus combined with back-button focus for better control in erratic lighting. This decouples focus from the shutter button, letting you lock focus independently and recompose without the camera re-hunting every time you press the shutter.
Set metering to spot or center-weighted for more accurate exposure readings on your subject rather than the overall scene. In high-contrast event lighting — a spotlight on a speaker against a dark room, for instance — evaluative metering will average everything out and leave your subject underexposed.
Quick Reference: Settings by Event Type
| Event Type | Aperture | Shutter Speed | ISO Range | Notes |
|---|---|---|---|---|
| Wedding reception | f/1.4–f/2.0 | 1/125s | 1600–3200 | Mixed lighting, moving subjects |
| Concert / live music | f/1.8–f/2.8 | 1/250s+ | 1600–6400 | Fast movement, stage lights |
| Corporate gala | f/2.0–f/2.8 | 1/60s–1/125s | 800–1600 | Slower pace, ambient light |
| Conference / speech | f/2.8 | 1/60s–1/125s | 800–1600 | Static subjects, podium lighting |
| Dance floor / party | f/1.4–f/1.8 | 1/250s+ | 3200–6400 | Fast motion, unpredictable light |
3. Recommended Lenses for Low Light Events
Prime Lenses (Best Light Gathering)
Prime lenses are the workhorses of low light event photography. Their wider maximum apertures let in significantly more light than zoom counterparts.
The 50mm f/1.4 is the versatile classic — affordable, sharp, and fast enough for nearly any lighting condition. The 85mm f/1.8 is ideal for flattering portraits with beautiful background separation. The 35mm f/1.4 shines for environmental shots that include context and venue atmosphere. And the 24mm f/1.4 gives you an ultra-wide option for capturing full venue scenes and large group dynamics.
Zoom Lenses (For Flexibility)
When you can't swap lenses mid-event, zooms offer coverage at the cost of a slightly narrower maximum aperture.
The 24-70mm f/2.8 is the professional standard — consistent aperture throughout the zoom range and enough versatility to handle most event scenarios from a single position. The 70-200mm f/2.8 is perfect for ceremonies, stage events, and distant subjects where you can't physically get closer. The 16-35mm f/2.8 handles wide venue shots and large group photos.
The trade-off is straightforward: primes are lighter, faster, and optically sharper at wide apertures — but less flexible. Zooms cover more focal lengths in a single lens but are bulkier and one to two stops slower. Most experienced event photographers carry a mix of both.
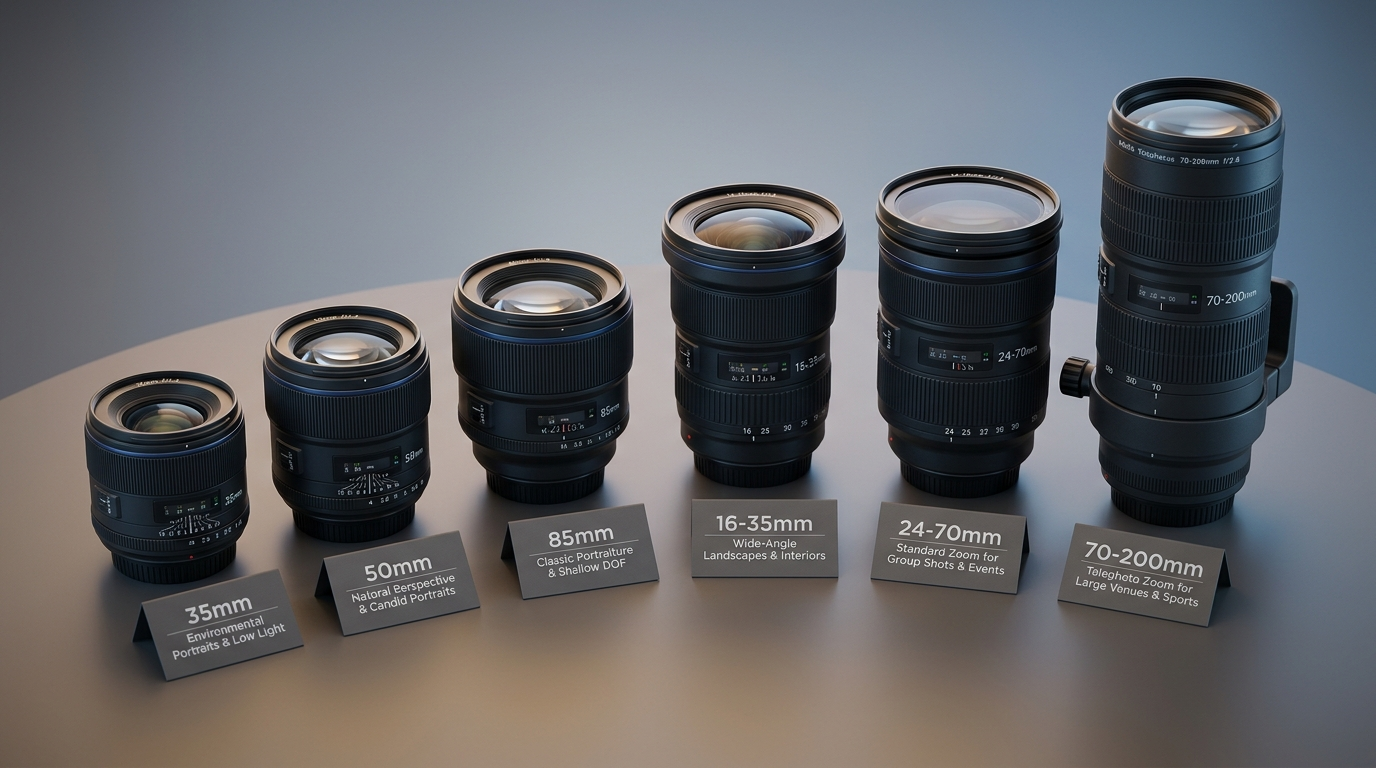
A typical low light event kit — fast primes for maximum aperture, versatile zooms for range.
4. Using Tripods and Stabilization
If your shutter speeds dip below safe handheld thresholds, stabilization tools become essential.
Lightweight carbon fiber tripods help maintain sharpness during slower exposures without the fatigue of hauling heavy gear through a multi-hour event. Enable in-body image stabilization (IBIS) or lens-based stabilization — most modern systems offer 3–5 stops of compensation, which is the difference between a sharp frame and a blurry one at 1/30s.
Use remote triggers or the camera's built-in timer to avoid introducing shake when you press the shutter button, especially for longer exposures during quieter moments like toasts or speeches.
One important caveat: stabilization compensates for camera shake but cannot freeze subject motion. A guest raising a champagne glass will still blur at 1/15s regardless of how steady your tripod is. Always adjust shutter speed for the movement in your scene.
5. Shooting Without Flash: Tips & Alternatives
Many venues don't allow flash — especially churches, concert halls, and certain corporate settings. Here's how to work with available light and still get strong results.
Position yourself near existing light sources. Windows, stage lights, candles, string lights, and architectural lighting all become your allies. The closer you and your subject are to these sources, the more light you have to work with.
Bounce and reflect light creatively. Light-colored walls, ceilings, and even a guest's white shirt can act as natural reflectors, spreading ambient illumination across your subject. Pay attention to how light falls in the room and position yourself to use it.
Match your white balance to the dominant light source to keep colors natural. Auto white balance handles most scenarios, but manually setting it for tungsten, fluorescent, or mixed lighting prevents color casts that are tedious to fix later.
If the venue permits it, small continuous LED panels can fill shadows discreetly without the disruptive pop of a flash. Panels with adjustable color temperature let you match the ambient environment seamlessly.
Above all, embrace the mood. Low light creates atmosphere — deep shadows, warm tones, dramatic contrast. Some of the most compelling event photos lean into that character rather than fighting it.
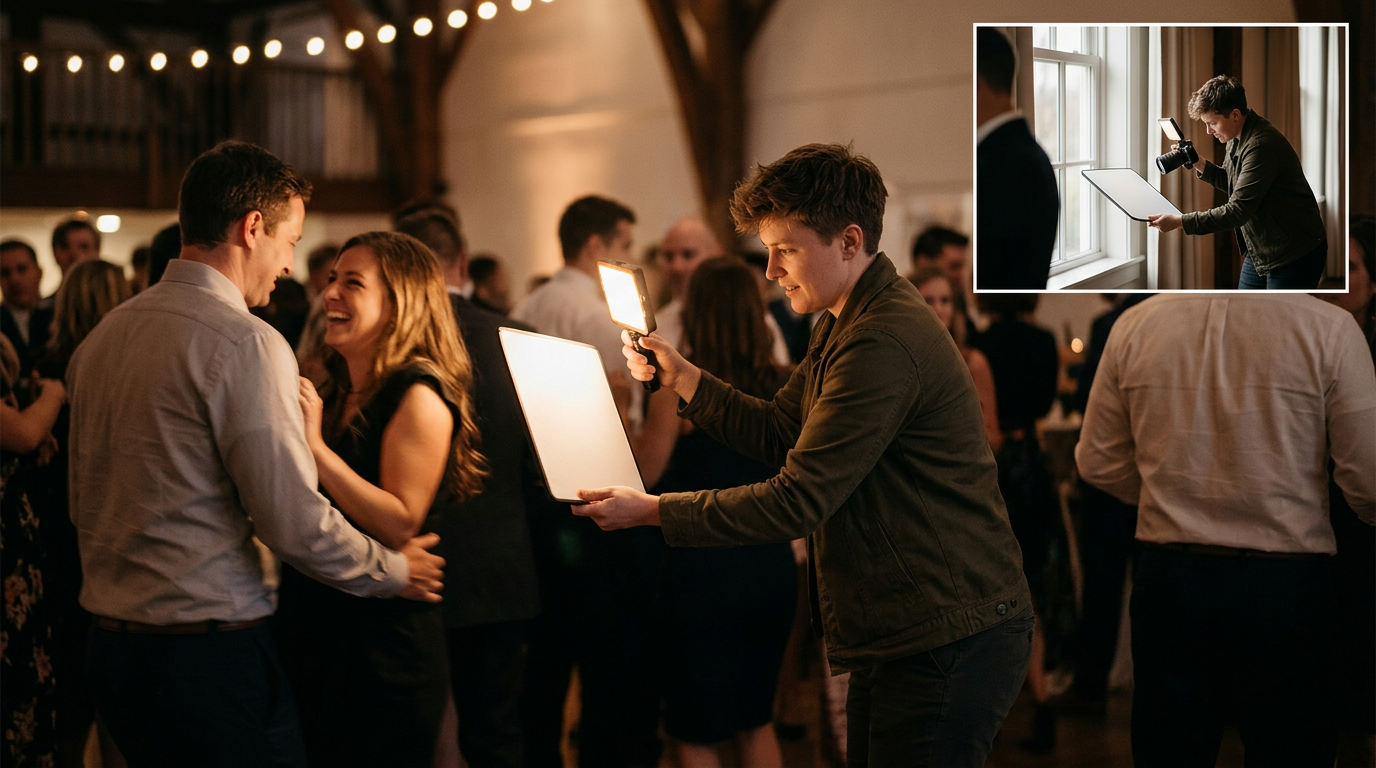
Working without flash — LED panels and reflectors help fill shadows discreetly in no-flash venues.
6. Manual Mode: Take Full Control
Shooting in manual mode gives you the flexibility and consistency that's critical when event lighting shifts constantly. Here's the workflow that keeps your exposures predictable in shifting light:
- 1
Set ISO (800–1600)
- 2
Choose aperture for light and DOF
- 3
Adjust shutter speed for motion
- 4
Check histogram
- 5
Focus with live view and peaking
- 6
Shoot and adapt
Start by setting your ISO to your camera's sweet spot — typically 800–1600 for full-frame bodies. This anchors your exposure baseline. Next, choose your aperture based on how much light you need and how much depth of field the shot demands. Finally, adjust shutter speed to balance your exposure and freeze motion appropriately.
Check your histogram often — it's far more reliable than the LCD preview in dark environments. Watch for clipped highlights (blown-out stage lights or windows) and crushed shadows (lost detail in dark areas). A slight rightward lean in the histogram is ideal because it captures maximum data while keeping noise lower.
For critical focus in dim conditions, use live view with focus peaking enabled. Focus peaking highlights in-focus edges with a colored overlay, making it far easier to nail focus manually when autofocus hunts. Back-button focus helps here too — lock focus on your subject, then recompose freely.
Practice adjusting settings quickly before the event. Know your camera's dial layout by feel so you can shift ISO, aperture, and shutter speed without pulling the camera away from your eye. At a live event, the three seconds you spend looking at your camera menu is the three seconds you miss a moment that won't happen again.
7. Post-Processing Low Light Images
Even with perfect settings, low light files benefit significantly from thoughtful post-processing.
Always shoot RAW. JPEG compression discards data that is nearly impossible to recover — and in low light, you need every bit of latitude for shadow recovery, noise reduction, and white balance correction. RAW files are larger, but the editing flexibility they offer is non-negotiable for professional event work.
Use noise reduction carefully. Aggressive noise reduction smooths away grain but also destroys fine detail — hair, fabric texture, skin pores. The goal is finding the balance where noise becomes unobtrusive without making your images look plasticky. Apply luminance noise reduction more freely than color noise reduction, since color blotches are more visually distracting than fine grain.
Recover shadows and tame highlights to balance the extreme contrast ranges common in event lighting. A singer in a spotlight with a dark crowd behind them might need +2 stops of shadow recovery and -1 stop of highlight compression to look natural.
Adjust color temperature to correct for mixed lighting — tungsten downlights, LED stage wash, and fluorescent overhead panels all introduce different color casts that rarely play well together.
Recommended software for low light work includes Adobe Lightroom (excellent all-around editing), Topaz DeNoise AI (dedicated AI-powered noise removal), DxO PhotoLab (outstanding camera-specific noise profiles), and Capture One (superior color science and tethering for studio/event hybrid workflows).
Deliver your event photos before guests leave the venue
Foto Owl AI automates photo sorting, face matching, and WhatsApp delivery — so you can focus on shooting, not sorting.
Start Free Trial10,000 photos per year · No credit card required
8. Final Thoughts
Low light event photography is challenging, but it's also where some of the most striking, atmospheric images come from. By mastering your camera settings — especially the interplay between aperture, ISO, and shutter speed — and pairing them with the right lenses and techniques, you'll capture sharp, vibrant photos without relying on flash.
Key points to remember:
- Use fast lenses (f/1.4–f/2.8) to maximize light gathering.
- Balance ISO with your camera's noise tolerance — test before the event.
- Prioritize shutter speed to freeze motion; 1/125s is your baseline for moving subjects.
- Shoot in manual mode for consistent, predictable exposures.
- Embrace natural light and work creatively with flash alternatives.
- Always shoot RAW and use noise reduction thoughtfully in post.
With practice, you'll confidently navigate any event lighting condition and create stunning images that capture the energy and emotion of the moment — even in the dimmest venues.
Have questions about dialing in your camera settings for a specific low light event? Drop them in the comments below — we'd love to help you nail your next shoot.